

FUNNYPLAYING
Game Boy Advance 3.0 Inch IPS LCD Backlight Kit M2 with Laminated Lens and OSD - FunnyPlaying
FunnyPlaying
Color
Game Boy Advance 3.0 Inch IPS LCD Backlight Kit M2 with Laminated Lens and OSD - FunnyPlaying
DMG
519 Davisville Rd.
519 Davisville Road
Willow Grove PA 19090
United States
Choose options
FunnyPlaying
Color
FunnyPlaying
Color
FEATURES:
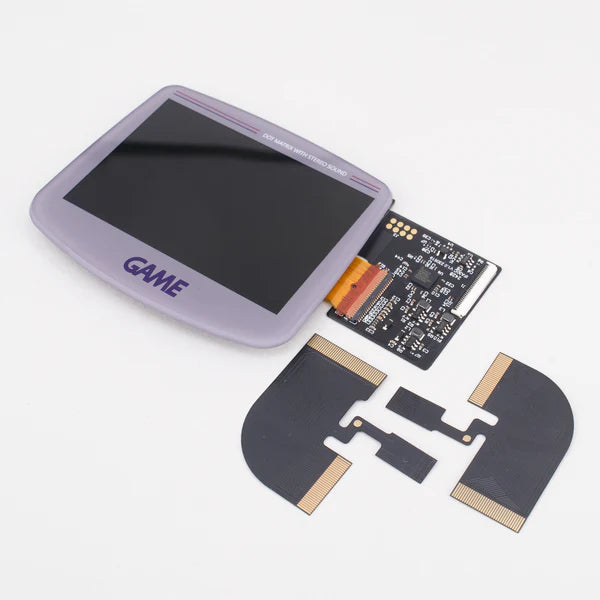
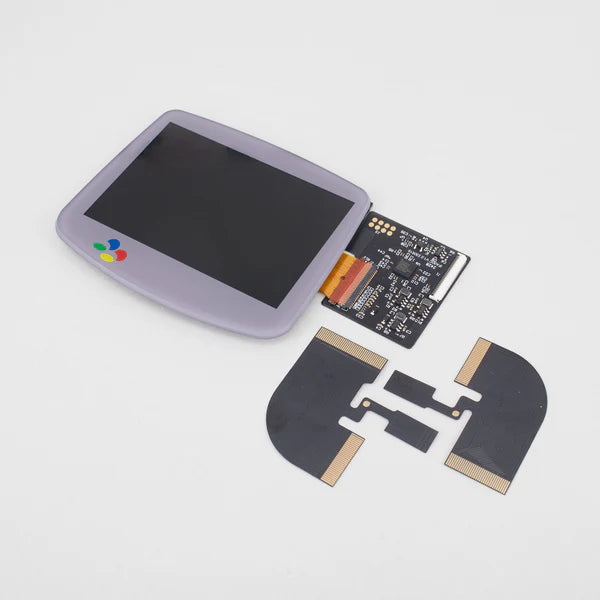
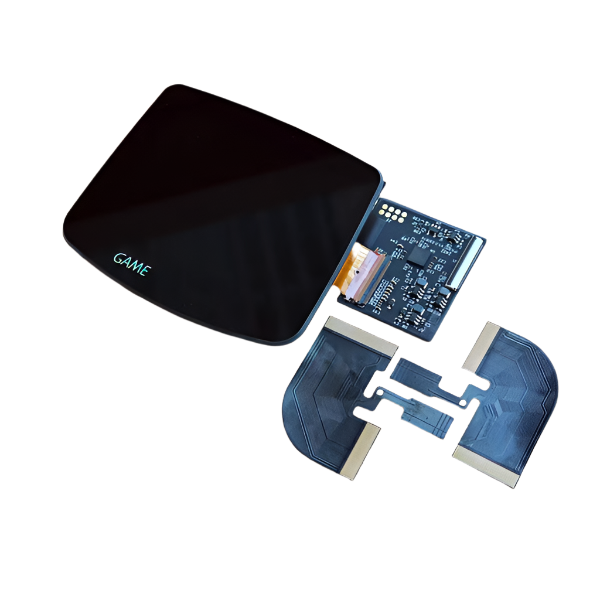
- An IPS and glass lens all in one piece.
- Adjust brightness with touch sensor.
- Long Touch the touch sensor for full OSD menu.
- 15 brightness options (BRT).
- 5 color options - normal, high contrast, retro color, grayscale, and GB green (CLR).
- 3 pixel modes - full pixel, interpolation, and retro CRT (DSP).
- Frame blending mode/flicker reduction (FRM).
- 3 color gamut options - warm, original, and highlight (CG).
- Soldering optional for button controls.
- Applicable console text is present on lens. Holographic text on black and white variants.
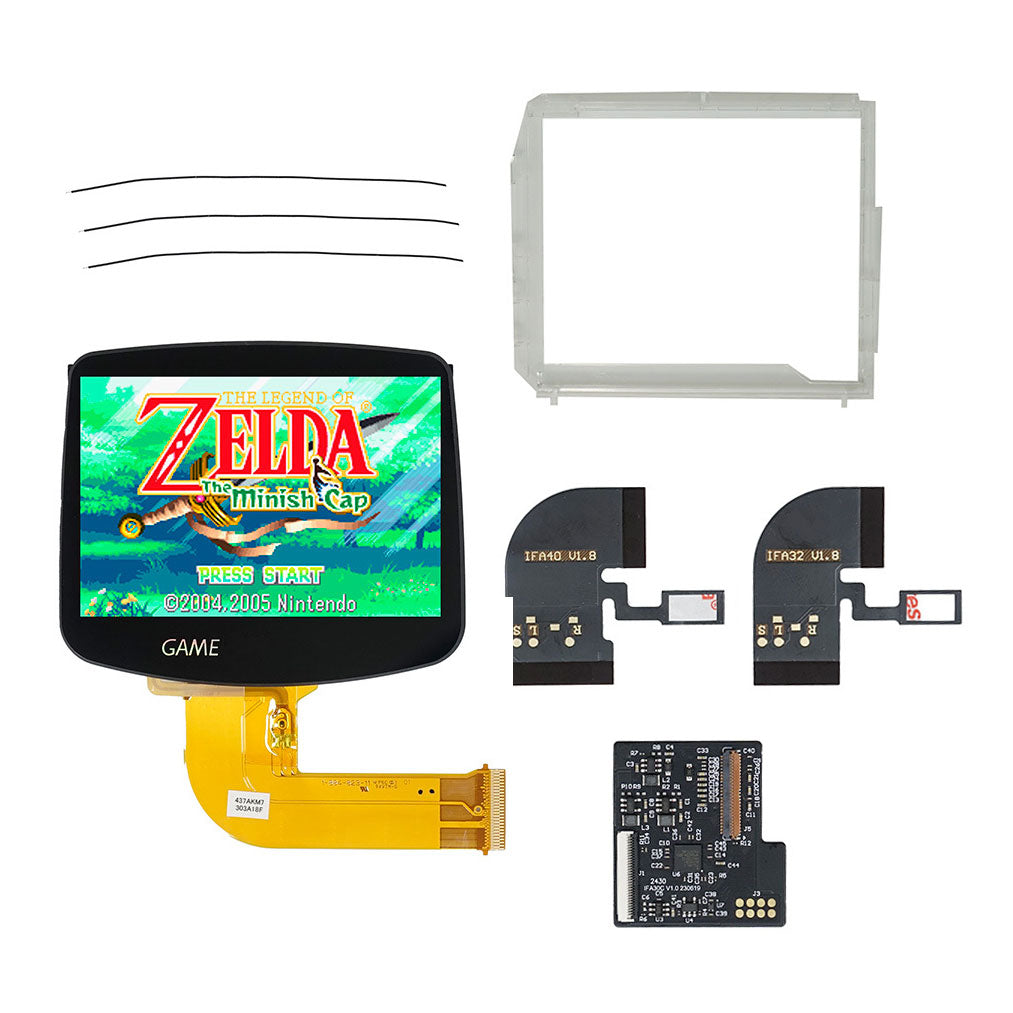
INCLUDED:
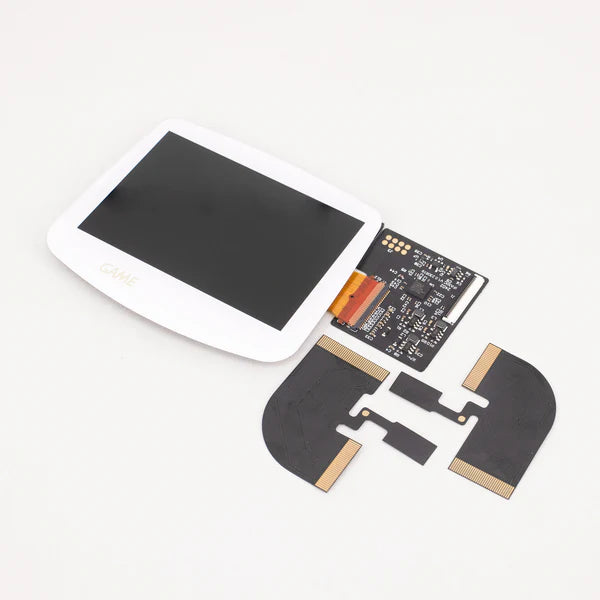
- 1 x IPS LCD with lens adhered (see warnings)
- 1 x PCB ribbon cable with attached touch sensor
- 3 x Wires
- 1 x Bracket
PAIRS WELL WITH:
- Game Boy Advance IPS/ITA Laminated Shell - FunnyPlaying (ONLY pairs with this shell)
- Game Boy Advance Silicone Membranes - FunnyPlaying
- Game Boy Advance Buttons - FunnnyPlaying
DOCUMENTATION:
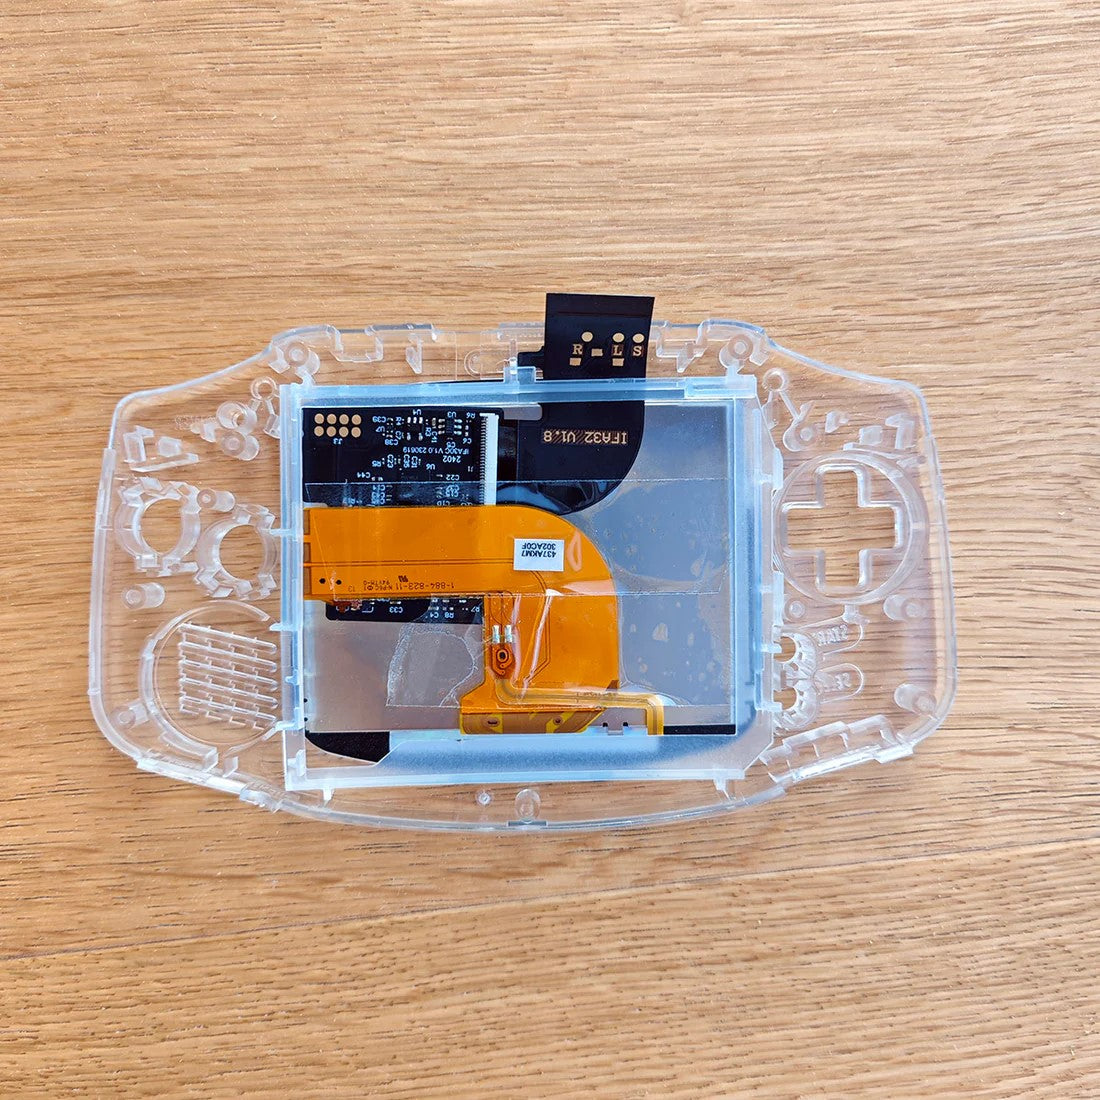
- See product photos for install information.
- How to test your LCD kit
NOTES:
- Only pairs with the Replacement Shell for Game Boy Advance - IPS Laminated - Funnyplaying. Other other shells require extensive trimming. Refunds/replacements are not accepted if the incorrect shell is used.
- If you received a bracket that looks different from the one in the product photo, you may have received the wrong bracket. Please check to make sure you have received the correct bracket. If this is not completed and the LCD kit is damaged, refunds/replacements will not be accepted.
- Long touch the touch sensor to bring up the OSD display menu, from there tapping the touch sensor once will adjust the value, and long holding the touch sensor a second time will allow you to cycle through the OSD. To exit OSD either wait 10 seconds or long hold the touch sensor for about 10 seconds.
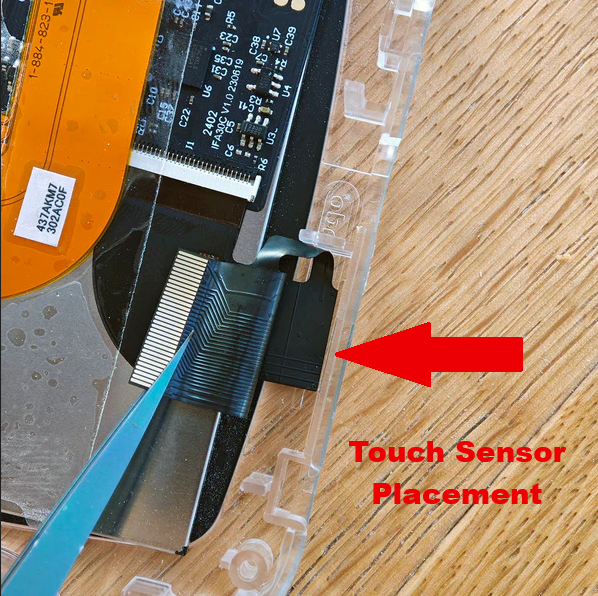
- No longer includes foam. Touch sensor (now a larger size) can be adhered to the back of the LCD with Kapton tape/included adhesive when folded in the middle. The touch sensor can also float freely without adhering while being held down by the bracket.
- After installation, if it is noted that your touch sensor is overly sensitive or is cycling, please see this article for assistance.
WARNINGS:
- You do not need to purchase a separate lens. Removing pre-adhered lens from LCD can result in damage to the LCD and will void product warranty. If you received an extra lens in your order, this was likely a included plastic lens with a shell and should NOT be placed on top of the pre-adhered lens.
-
Test before installation! When you receive a backlight/LCD kit, you should perform a dry run before installing to assure that nothing has been damaged in transit. A dry run or test fit means the kit is not installed in the shell. This includes the use of adhesives, brackets, and any performed soldering. All ribbon cables should have no bends or creases in them. If you are unsure how to perform a dry run, please contact our support team and we will be happy to help. Backlight kits that have been installed are not eligible for replacement or return.
- LCD may break if put under too much pressure or dropped. Please exercise extreme caution when installing.
Customer Reviews
I saw lots of people saying this is an easy 20min job,
First time doing this and it was a nightmare of nightmares. Took me 4 hours!
The instructions for this screen on YouTube don't have the same setup with the ribbons.
So on another video for the SP you will find the same ribbon .
Couldn't figure out how to plug them in properly , turns out the the little bits you plug the ribbons into , one has 2 pieces to pull out to release , the other one the long black bit needs to flip over.
The ribbons go pins down.
You will need the funny playing shell to go with it. The overall fit is extremely tight , so it was pretty tricky to make it all fit together with that plastic screen holder.
Turns out you have to put the screen holder first , perfectly in place , then the rubber bits of the buttons overlap on top of that.
I haven't even done any soldering , just got the thing operational.
I will say the screen looks amazing compared to the original.
And I got the clear case which looks pretty sick also.
Great product but an up to date tutorial would be a lot of help .
But hey we all learned something today.
BE CAREFUL. There are no instructions about how to assemble, and the only guide are the pictures listed under the product when you go to buy it.
When you're assembling, be careful with the orange ribbon cable that goes into the port with the BROWN flap. You have to first FLIP UP the brown flap, then insert the orange cable, and then FLIP DOWN the brown flap to secure it. This is the only connection that's like this and I messed up my first screen because there was nothing indicating how it was supposed to be inserted.
Thank you for your feedback! As a small company, we often rely on suppliers to provide install guides/photos for their products. Unfortunately, FunnyPlaying only provides the photos we have on the product page at this time. We will look into seeing if we can find some time to create a guide for this kit to help with an easier install. For future reference if needed, there are a lot of modders out there with YouTube channels that will make install videos for a lot of these kits. If you have any questions, feel free to reach out to us at support@handheldlegend.com.
It was challenging to find instructions. Everything we found referenced another kit. Eventually we realized that the two included cables were an either/or situation. The product images offer insight into an instruction not listed anywhere else - where to put the touch sensor. The screen frame placement is also detailed in the product images. The screen itself fits perfectly into recommended shell, its so seamless. Overall the project was a delight. So much so we ordered another.

I bought the recommended aftermarket GBA shell to go with it and this screen dropped right in. After moving over the other hardware from the old shell, I was gaming in less than 30 minutes. Please note I did not solder wires for the on screen controls. Highly recommend! You'll love being able to see your games in their backlit glory.
Just tried this kit out for the first time, and so far it's great! Crystal clear picture and lots of options. Super easy to install. Start to finish, I put a GBA together with this kit in like 20-30 mins. My only con is how limited the shell options are to fit the kit. Hopefully in the future this kit will have a more universal shell fit.
The screen is amazing! I fully and highly recommend…. However, be sure to attention. I ordered a she’ll from the same site that is ISP ready, but it was not compatible with the new Screen. Double check the compatibility.Screen cut out is different.