Ever wondered how in the world you test your IPS LCD kit?

In this video, we will take you through the steps needed in order to test your LCD screen pre-installation for either the IPS V2 kit or IPS V3 kit. We will go over the testing itself and showcase both beginner and advanced methods alike. As well as go over equipment, errors and what issues you may encounter when testing the LCD itself. Down below, you will find a simple quick start guide to get you started. We hope you enjoy and be sure to check us out on YouTube!
Here is some of the equipment that you'll need to get you started.
- A Phillips head and a Tri-wing screwdriver.
- Some sort of prying tool.
- A pair of tweezers.
Other than the tweezers, we sell a full kit of these tools on our website if you do not have them.
A pair of tweezers can be found here.
Step 1: Disassemble your Game Boy


* The ribbon cable should be fully disconnected from the motherboard.
Step 2: Preparing Your LCD Test
Start by connecting your ribbon cable to your LCD and inserting the ribbon cable into the motherboard slot. Then, latch the two tabs down and place the motherboard in the shell with the cartridge slot up. Lastly, all that's left is to power on!


Step 3: Advance Methods For Testing
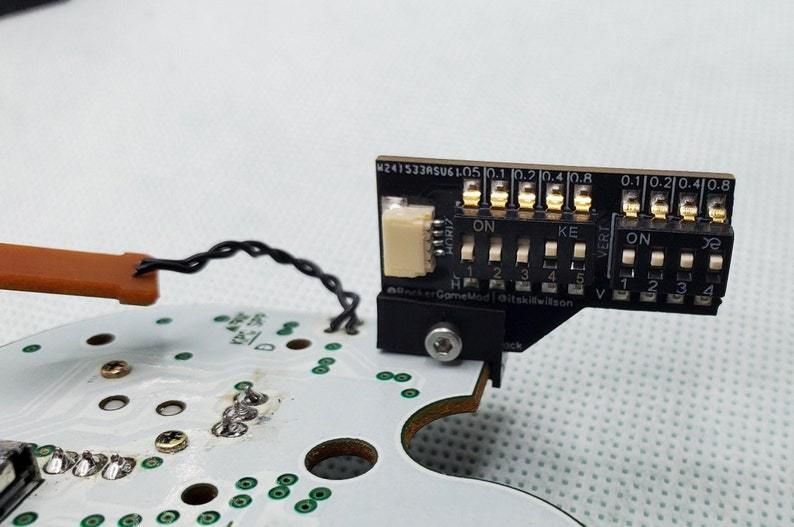
The method that we just went over, is a very simple method to testing your LCD overall. In addition to that, we wanted to show some more advanced methods for testing your LCD if needed. Both the IPS V2 & V3 kit are similar in testing, both do offer additional brightness functions. The only difference is that the V3 kit offers additional color functions that you may need to test for appropriate voltage/reading. We used an external power supply to accurately test each LCD is shown (make sure your power supply is set to 0.3.20 volts).
- First, connect your LCD and ribbon cable. Then, insert your ribbon cable into your motherboard and lock the tabs down.
- Next, connect your alligator clips; attach the negative clip (black) to the negative terminal and the positive clip (red), to the positive terminal.
- Then power on and visually inspect for any defects, powering issues, backlighting problems, etc.


Step 4: Defects & Errors
There can be a variety of issues when it comes to testing your LCD. Sometimes its manufacturing issues, a misstep during the installation process or something else that is small that is hindering the process like pressure points under the screen. Here are some of the things you should be on the look out for when powering on your LCD:
- Dead pixels
- White spots
- Back-lighting issues
- Scratches
- Pressure points
- Or any other small defects.

*Here we have two dead pixels on the same screen.


*Here we clearly powered on the Game Boy, but the LCD isn't turning on. Our external power supply is also showing low voltage.
LCD Video Tutorial
If you need further help or if you just need more of a visual guide for your installation process, you can follow along with our LCD Test Tutorial video below! If you still need additional support, please contact us at support@handheldlegend.com.