The following guide shows the installation process for the @RockerGamingMods and @itskwilson no reset snapback mod
If you want to see this in video format refer to the following video - https://youtu.be/DqofaLC5_oc?t=278
Tools required:
- Wing Screwdriver
- Flush Cuts - I would recommend these: https://amzn.to/3zB5jMu
- Soldering Iron - I would recommend this one - https://amzn.to/2S94xDk
- Solder - I recommend this https://amzn.to/2QuLXqy
- Flux - I recommend this https://amzn.to/3aDyNyc
- Desolder wick - for any mistakes. I recommend this https://amzn.to/2vIZ4Xb
- Multimeter with continuity https://amzn.to/3CziopS
NOTE - All kits purchased after 11/18/21 directly from RG or HHL will contain 2 mounts the black mount will be for a standard install WITHOUT Shinewave. The white mount should be used WITH Shinwave.
OPTIONAL, but recommended
- Softmodded Wii with Smash Scope homebrew installed
Step 1 - Open the Shell with your Tri-Wing Screwdriver

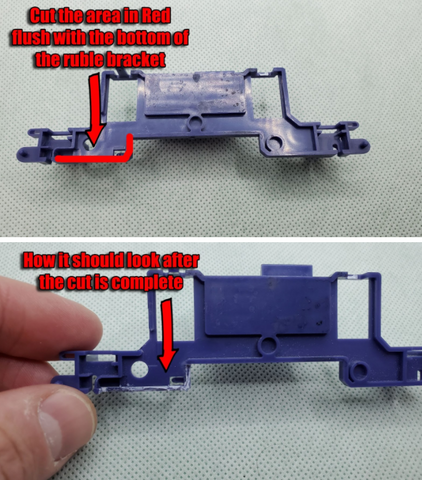
2 - Remove Ruble bracket
3 - Make necessary cuts to the Rumble Bracket with your flush cuts
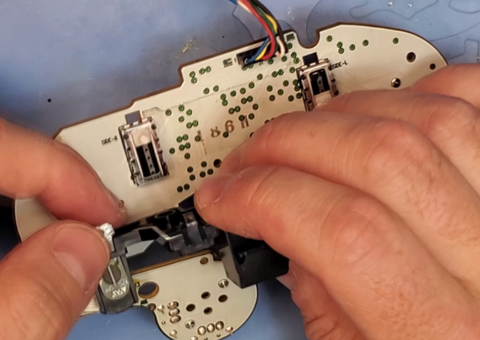
4 - Solder the 4 wires from the wiring harness to the thumbstick potentiometer

5 - Replace rumble bracket and make sure the wires from the harness route out the bottom through the cuts we made before

6 - plug in the wiring harness to the snap back board

7 - Mount snapback board to the controller pcb

8 - tune the snapback kit, refer to the video below.
https://youtu.be/DqofaLC5_oc?t=631
Link to Smashscope for your modded Wii - https://goomwave.com/wp-content/uploads/2020/06/SmashScope.zip
Link to this guide- https://docs.google.com/document/d/1vTHH3v_ZyUKRBclqKstmgJAUR5obJGCDNgq7Z_Vxuhw/edit?usp=sharing