HDMI Out IPS Kit for Atari Lynx II - HISPEEDIDO
HDMI Out IPS Kit for Atari Lynx II - HISPEEDIDO
Hand Held Legend
519 Davisville Road
Unit 102
Willow Grove PA 19090
United States
Choose options
FEATURES:
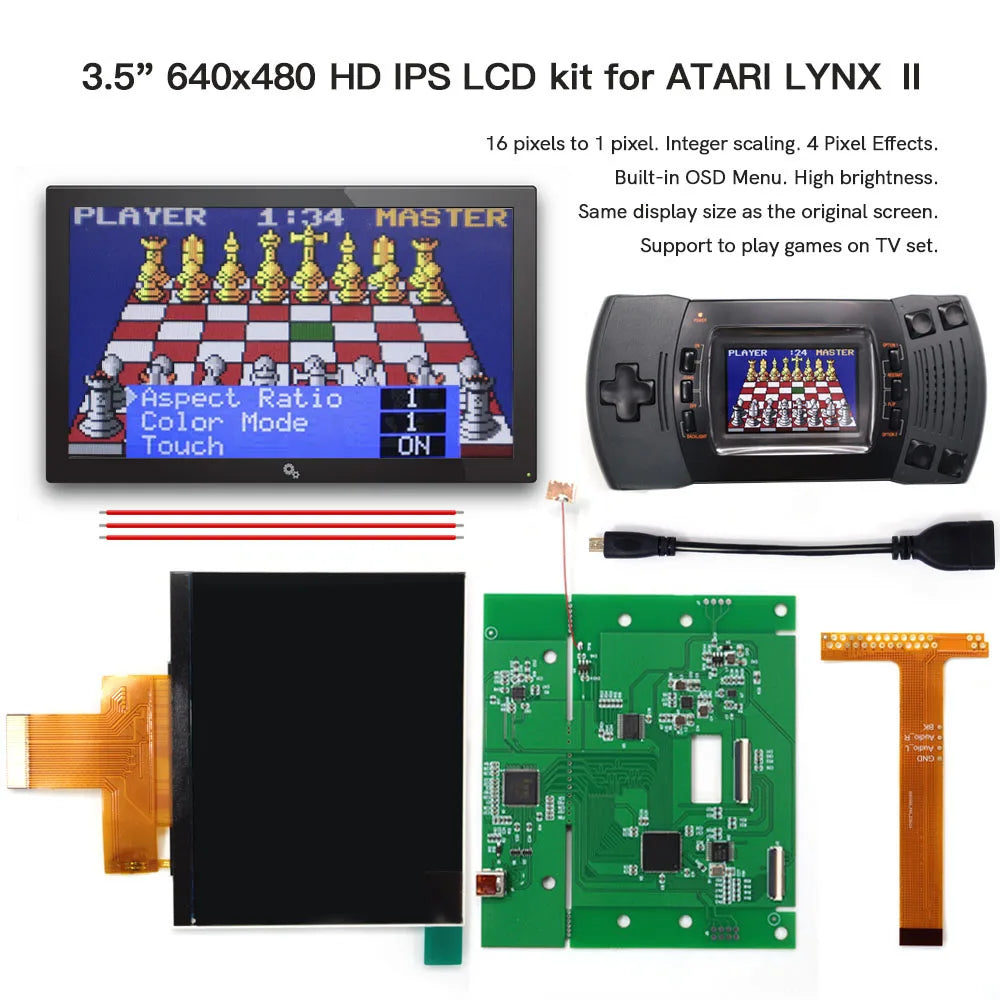
- 640x480 display resolution HD LCD. Same display size as the original screen.
- 16 pixels to 1 pixel. Integer scaling (The original LCD display resolution is 160 x 102. This LCD use 640x408 display area to make the image integer scaling ).
- Wide View angle up to 178 degrees.
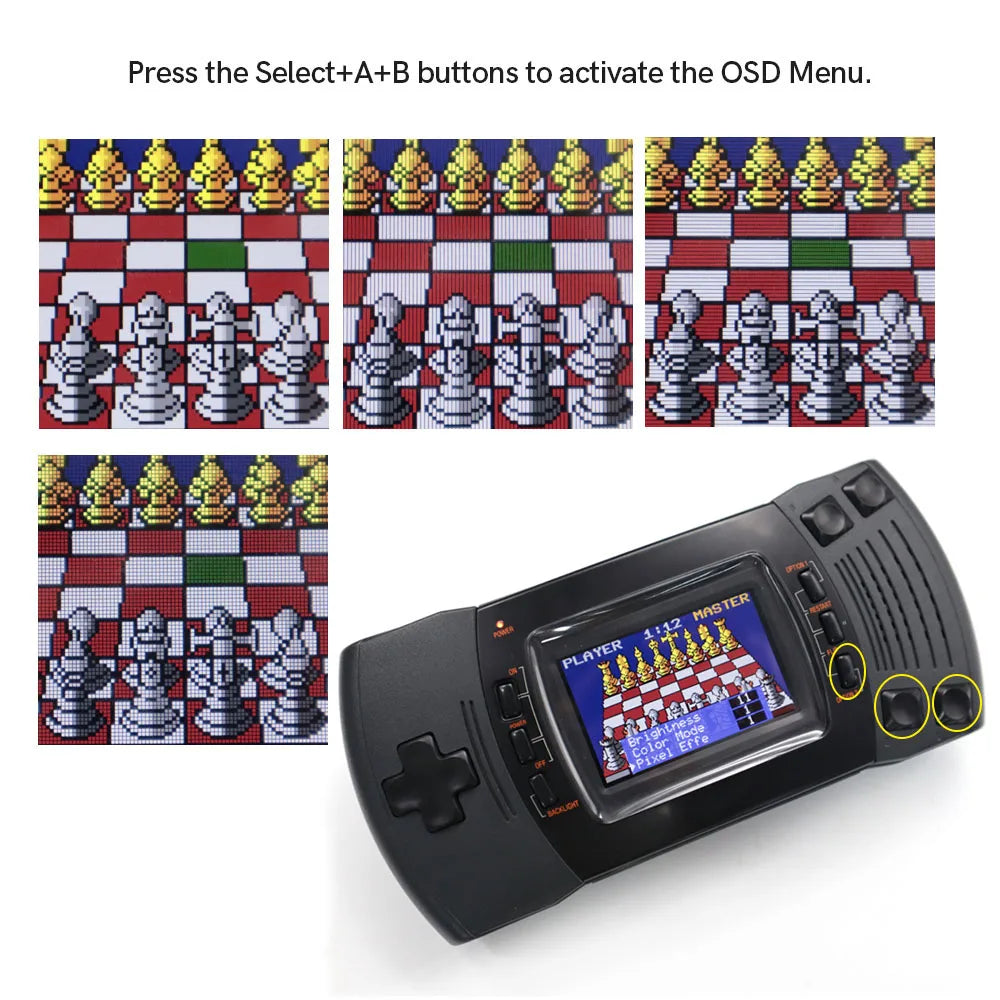
- Built-in OSD menu.
- Retro pixel Effects: Normal, Retro pixel, Scanline 1 and Scanline 2.
- 15 brightness levels.
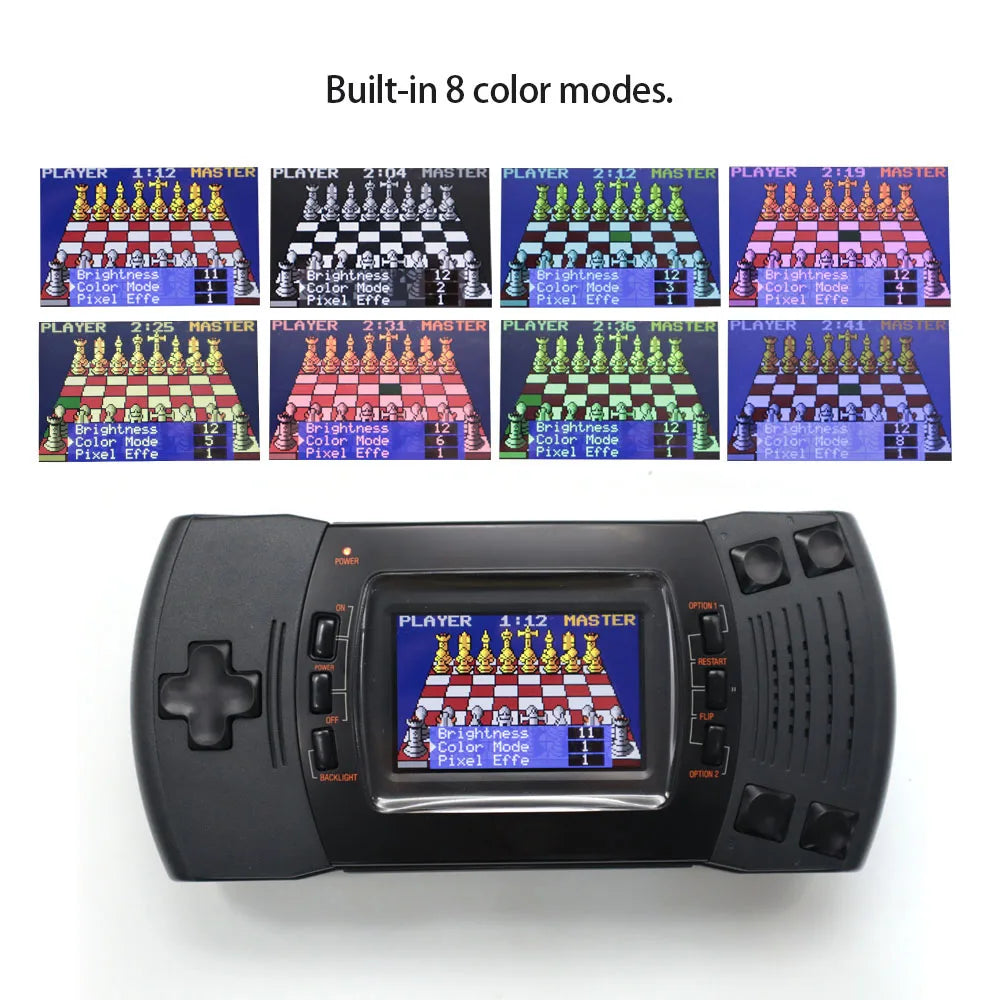
- 8 color modes.
- Touch screen to change the retro pixel.
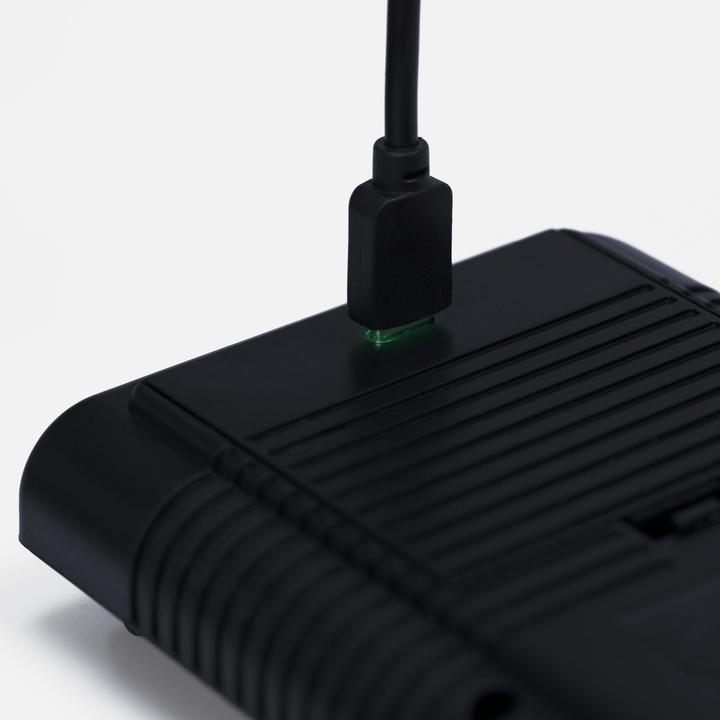
- 720P HDMI-Compatible Output. Support to play games on TV Set.
- 3 TV Aspect Ratios.
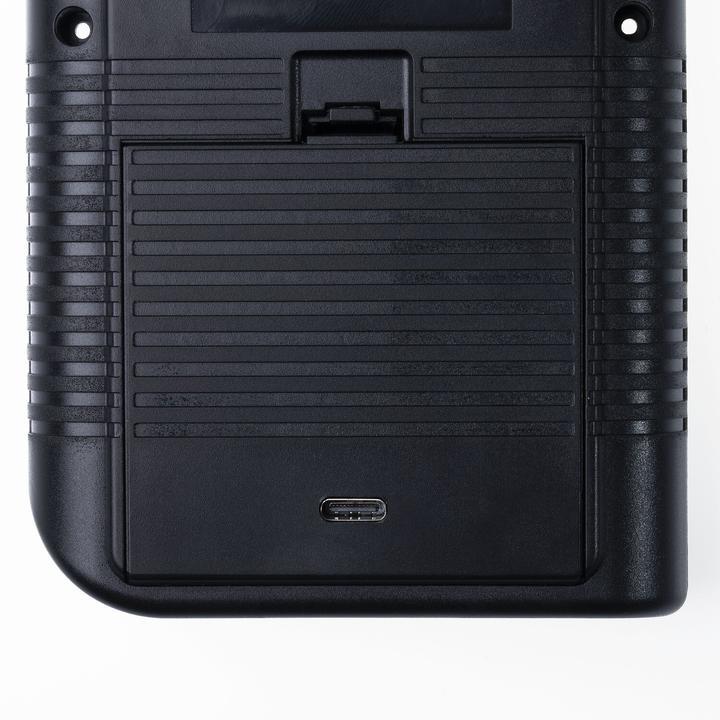
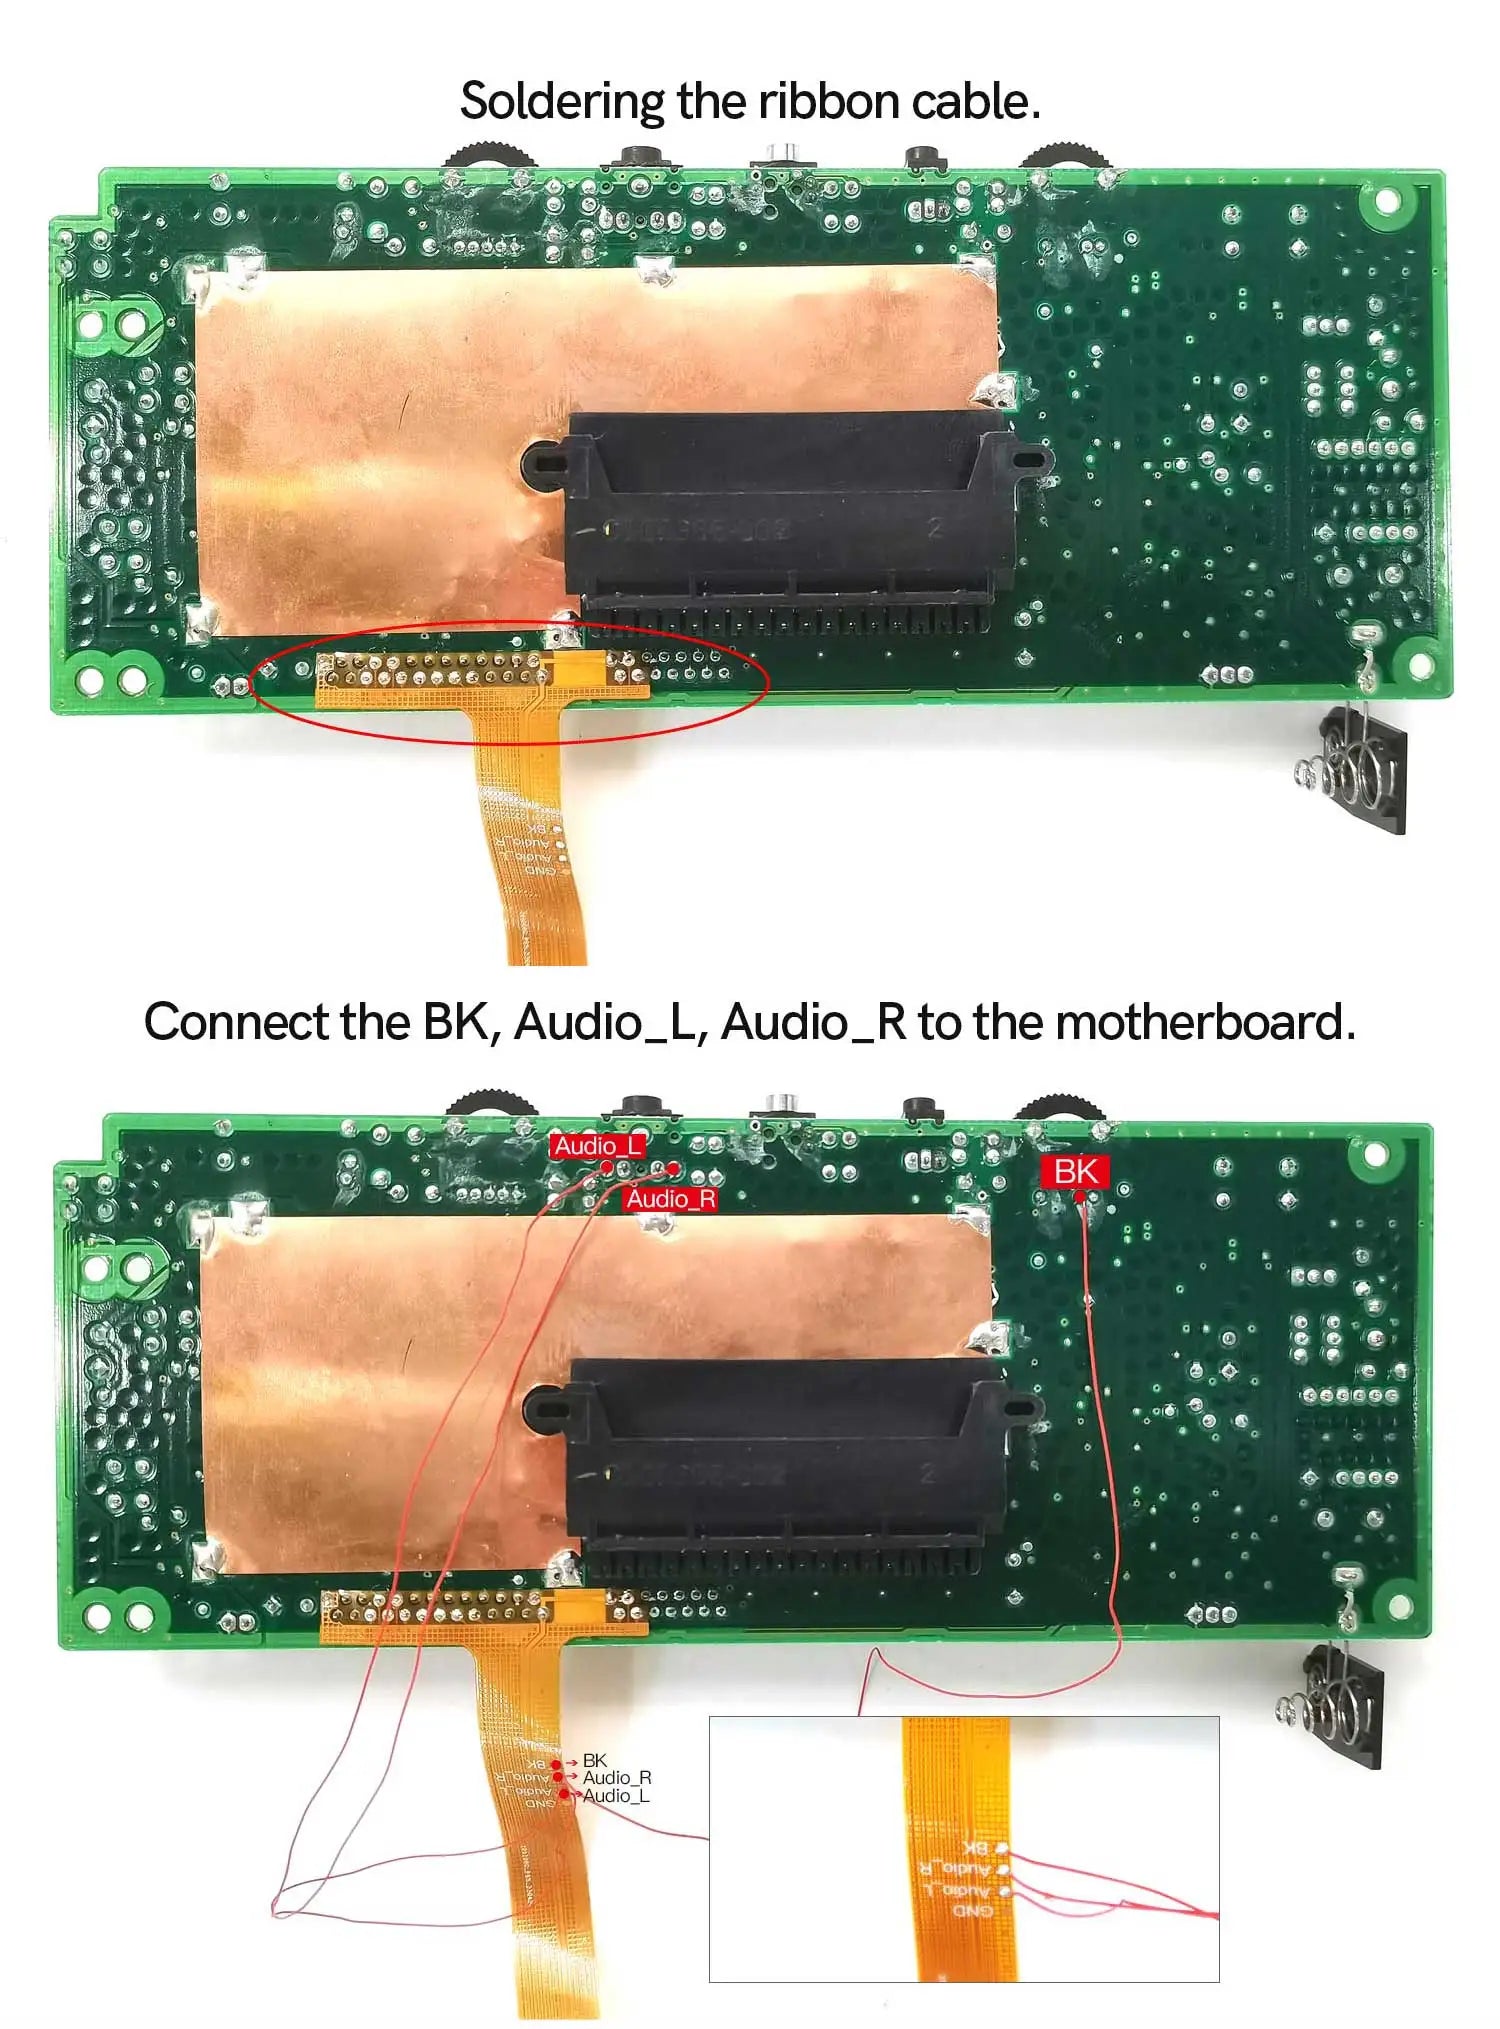
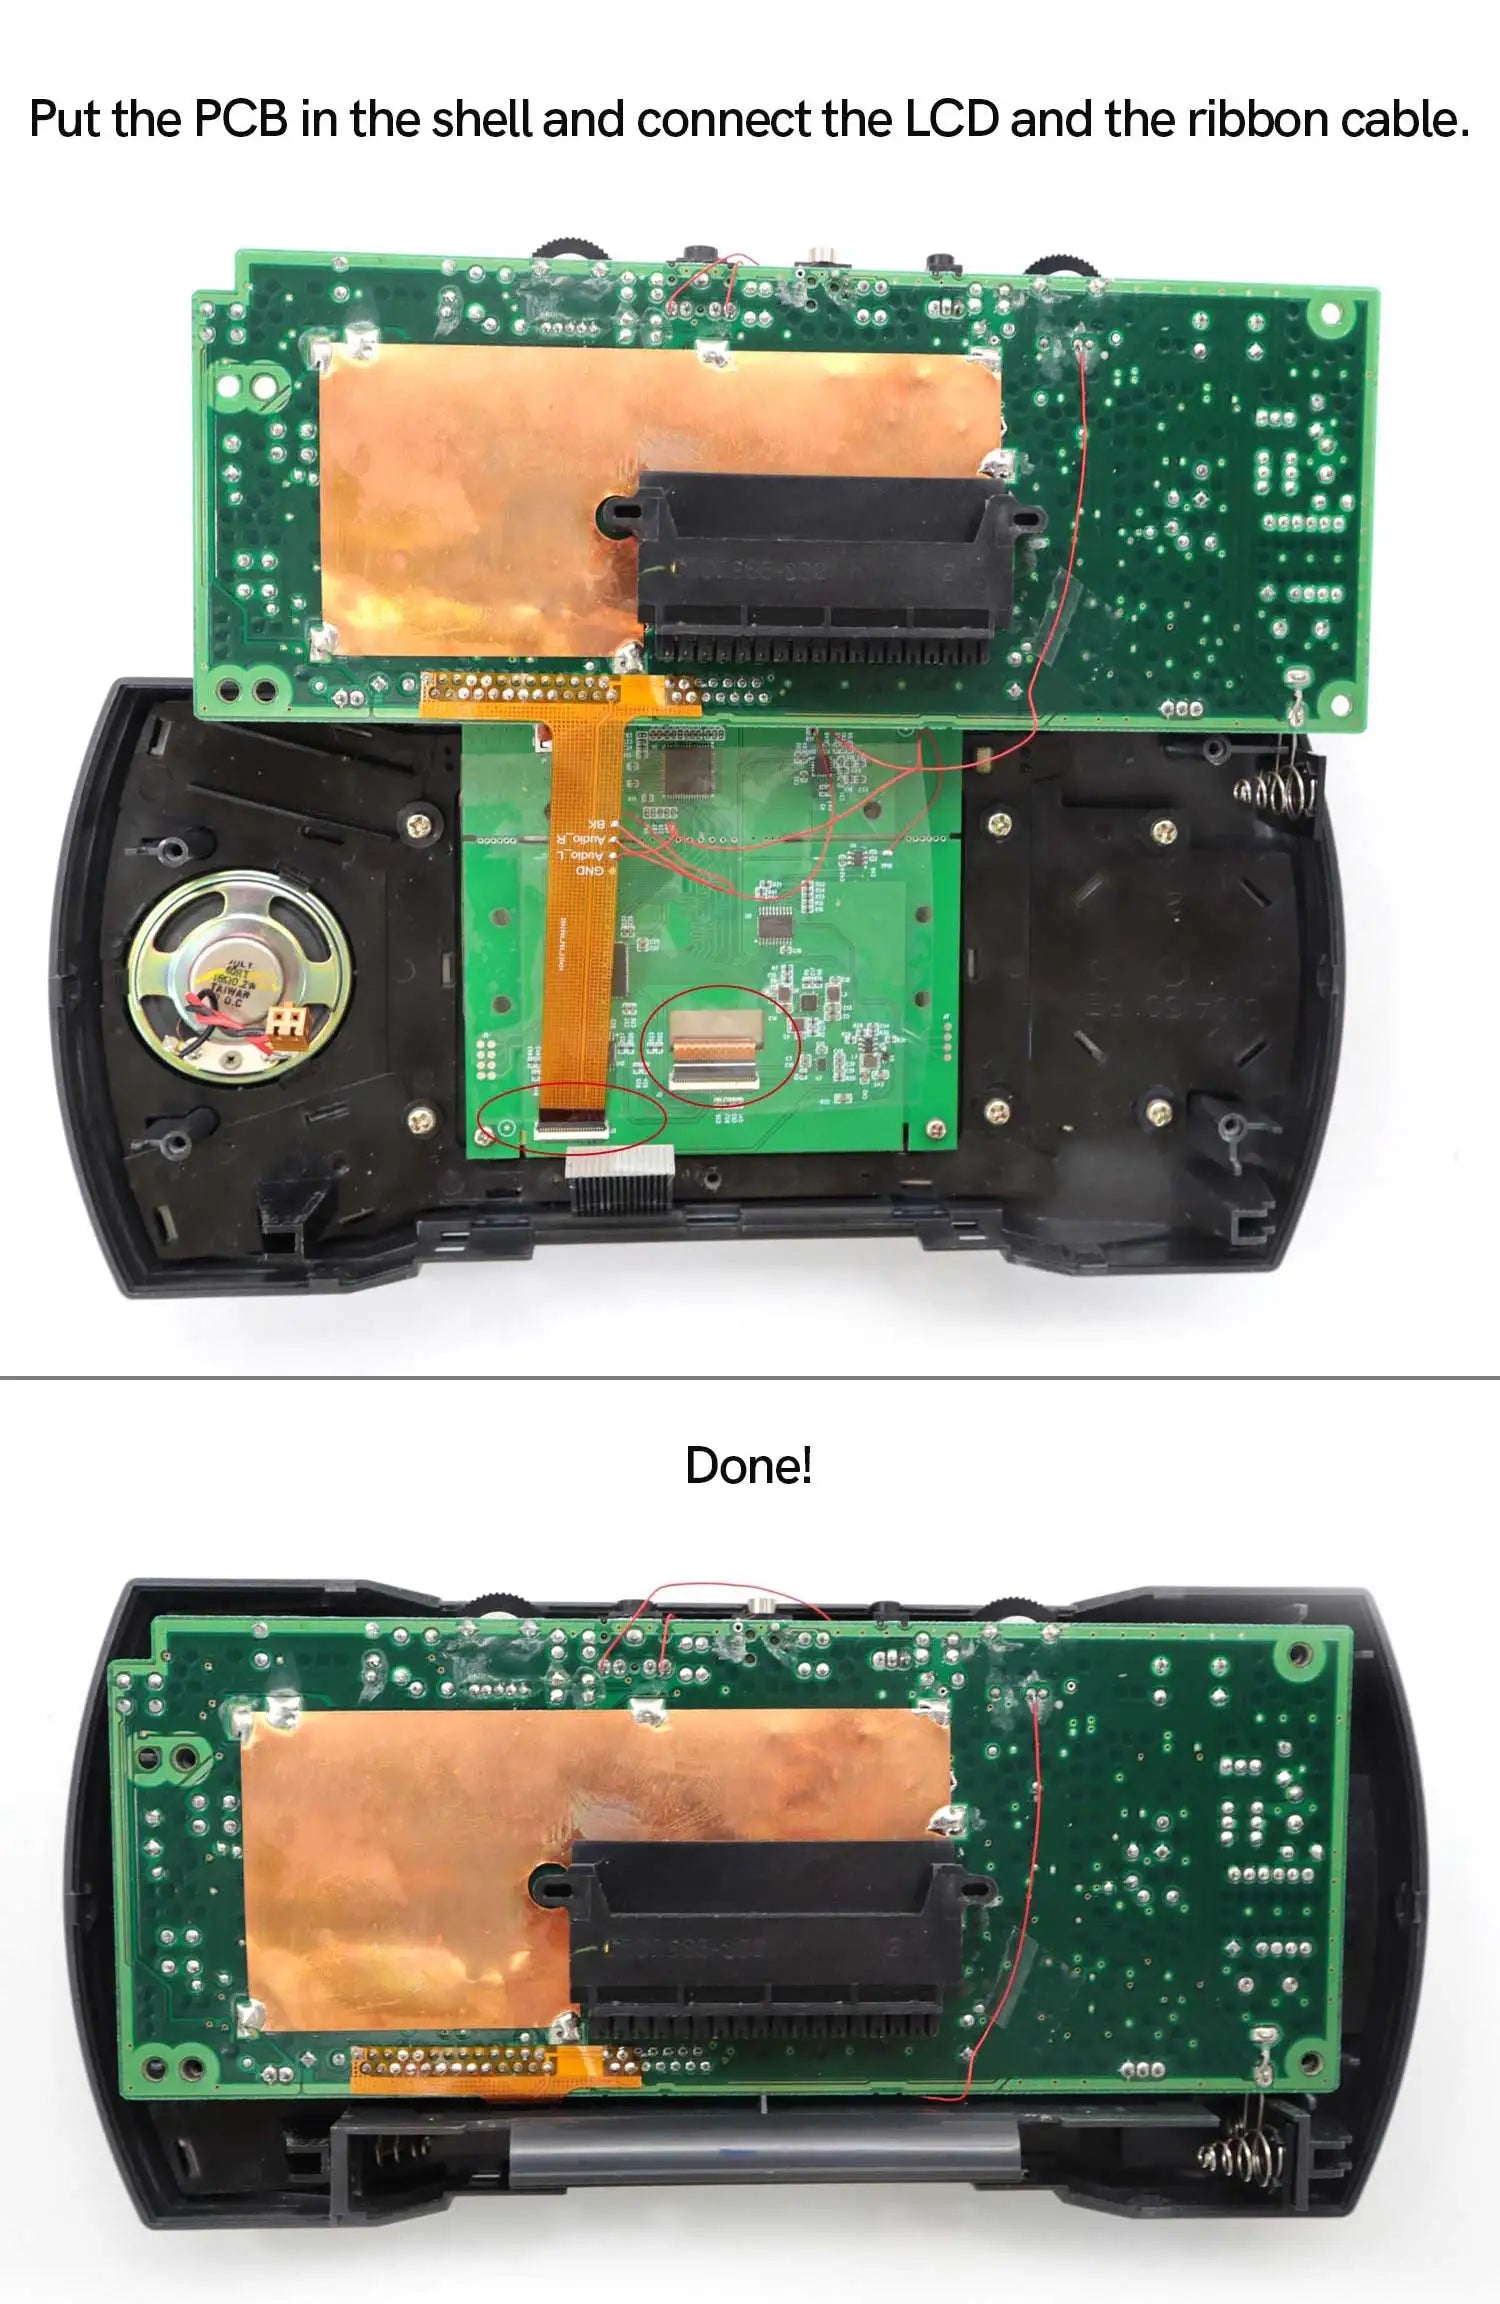
- FPC connect cable design. Simpler wiring and easier installation.
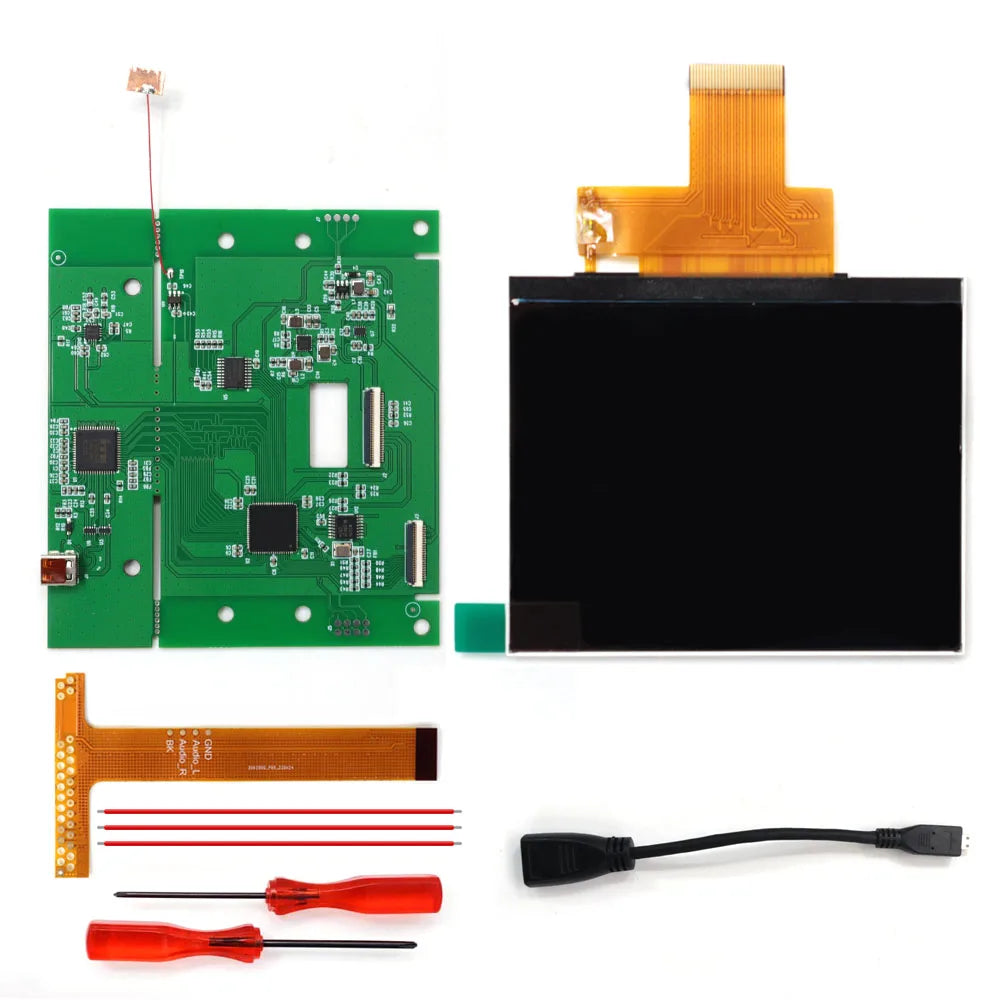
INCLUDED:
- 1 x IPS Screen
- 1 x IPS Motherboard
- 1 x Ribbon Cable
- 1 x Adhesive
- 2 x 0 ohm Resistor
- 1 x Mini HDMI to HDMI Adapter
- 4 x Wires
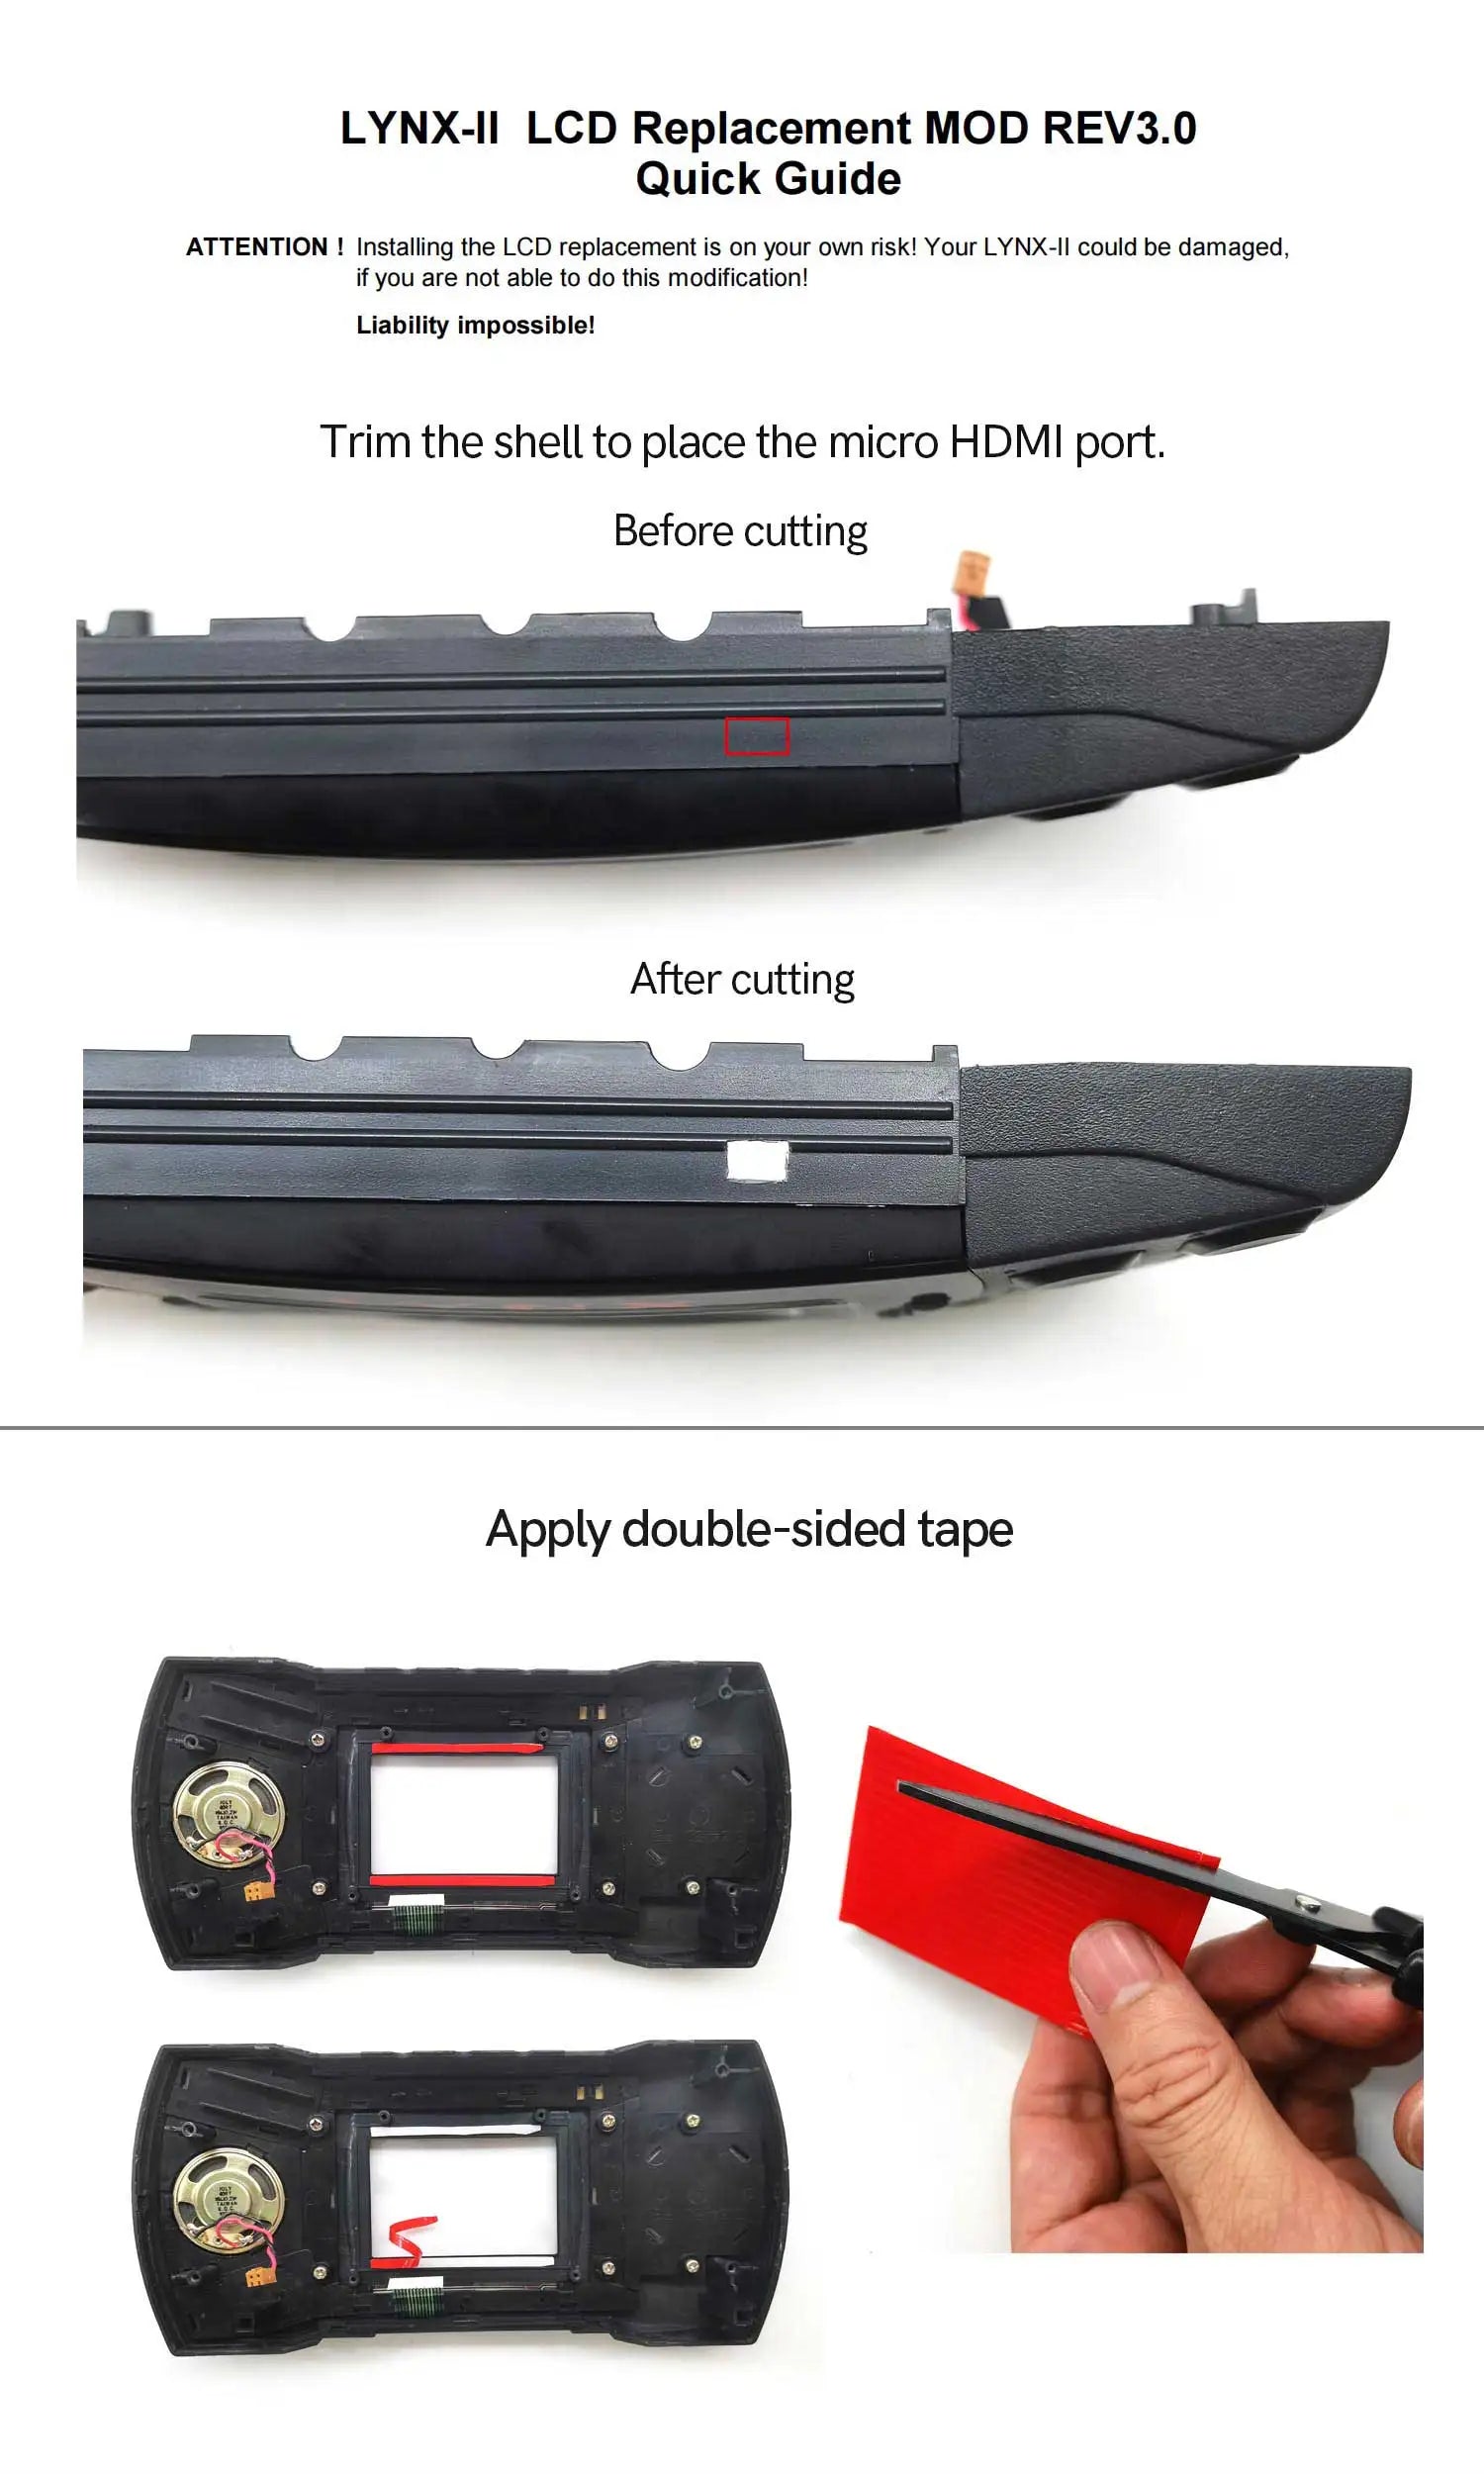
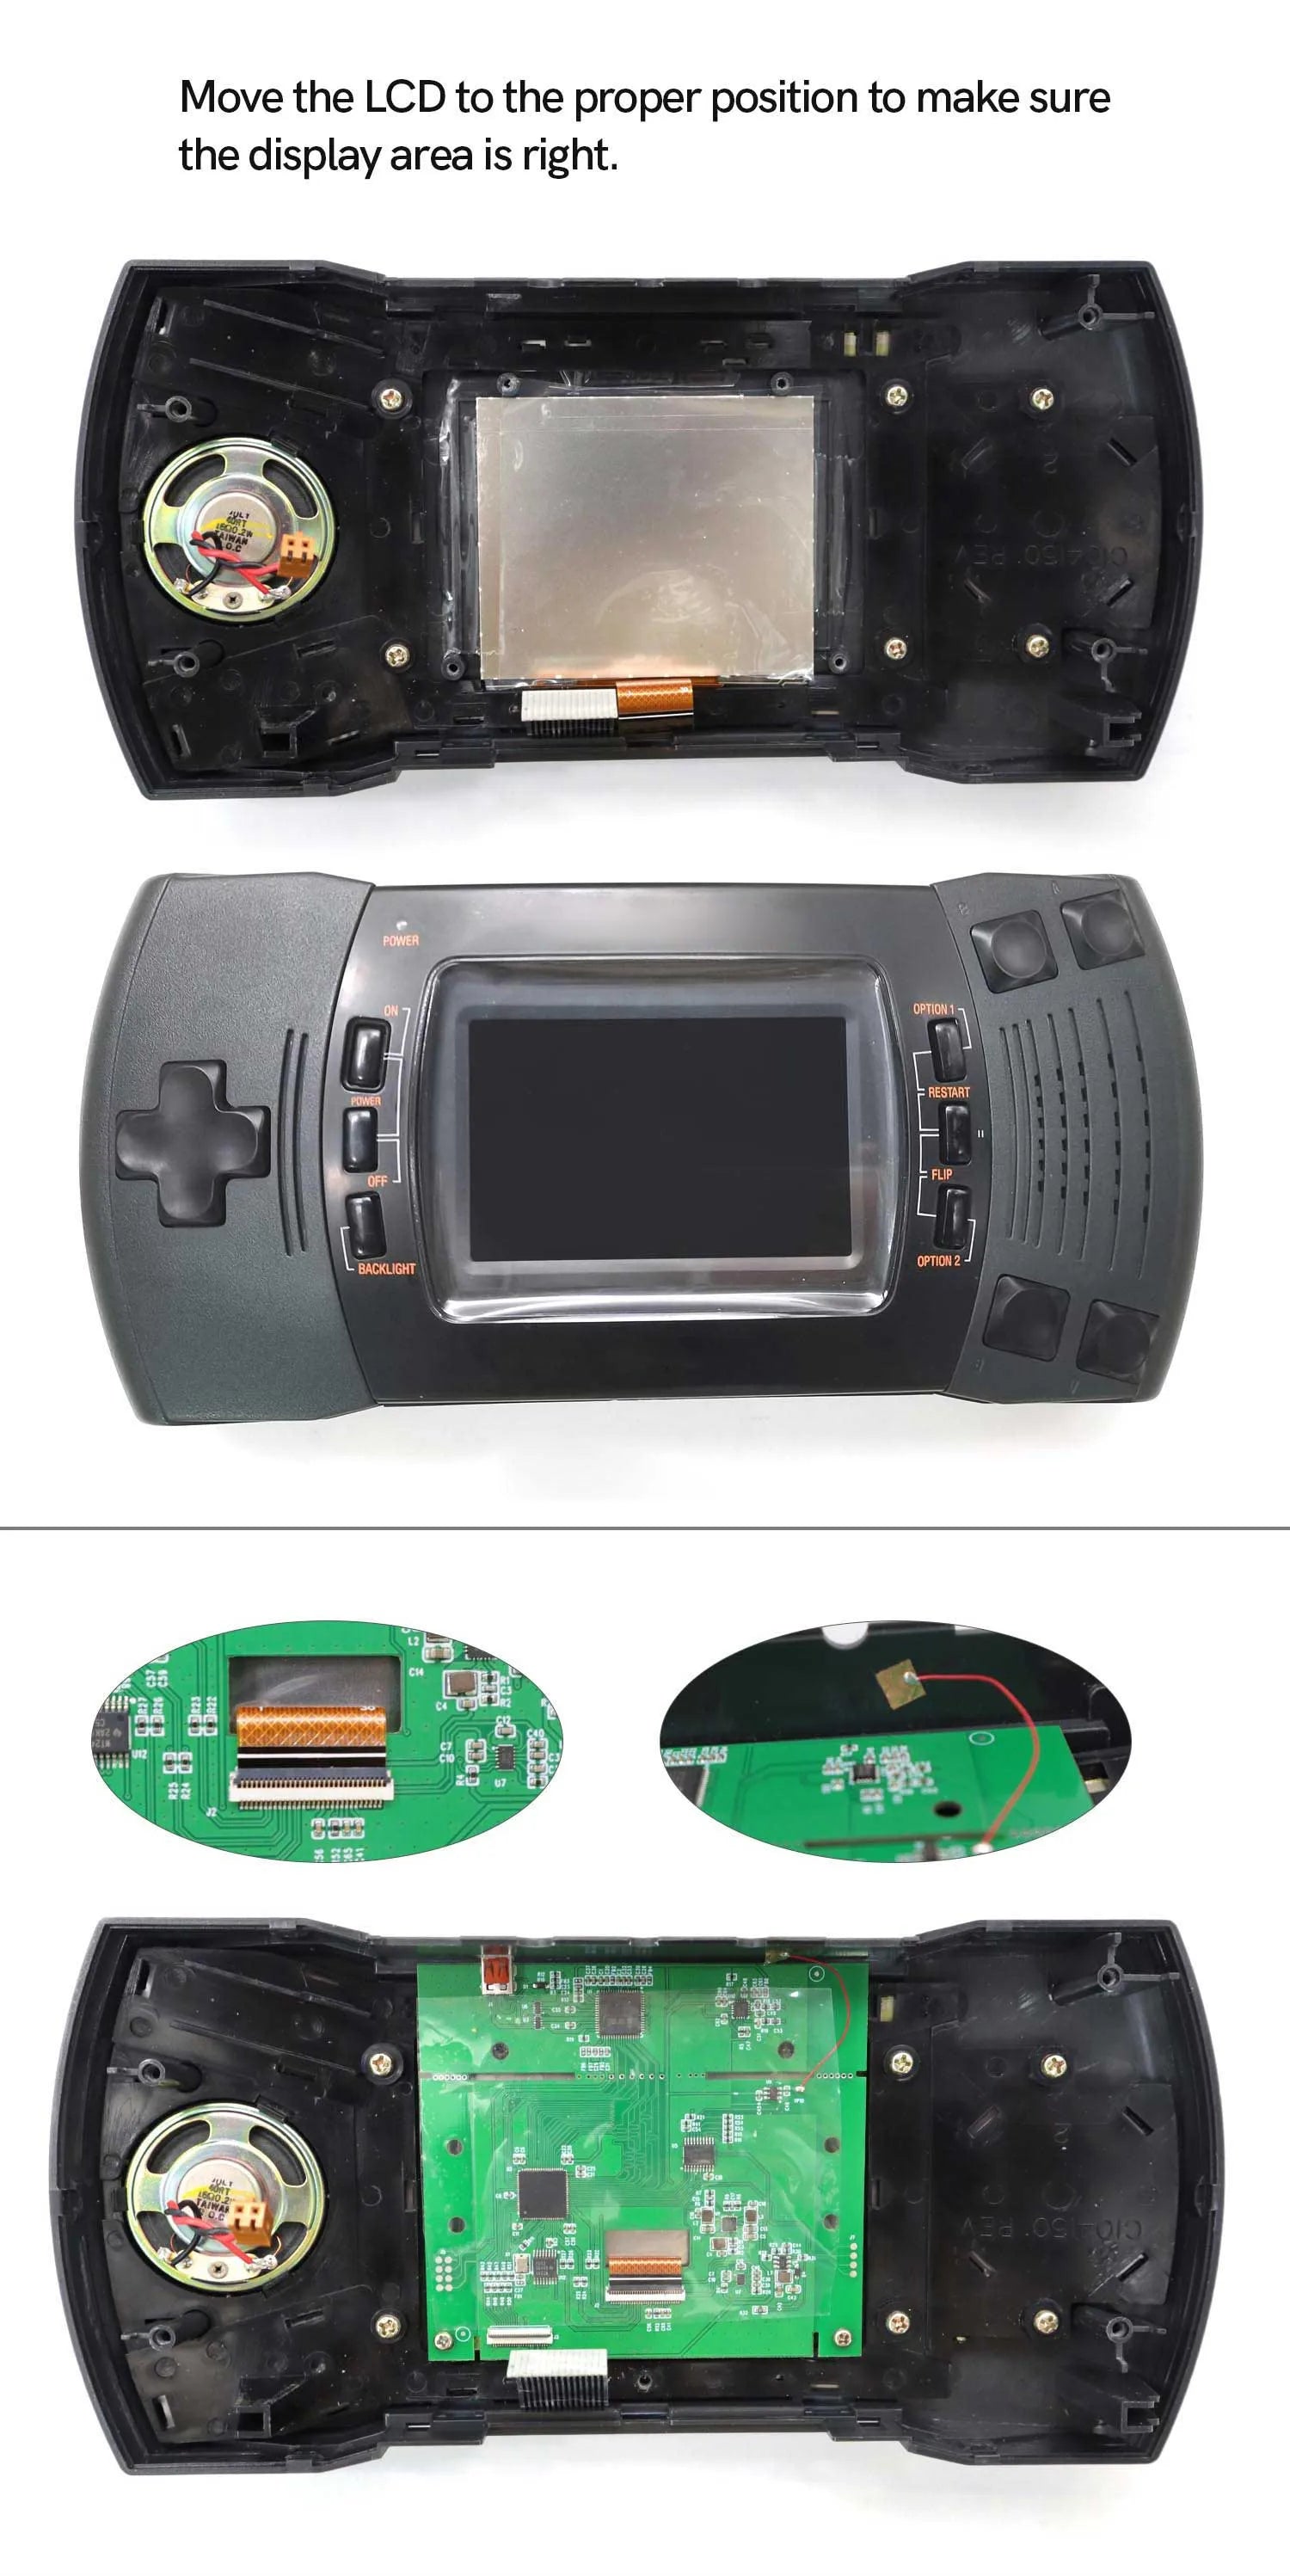
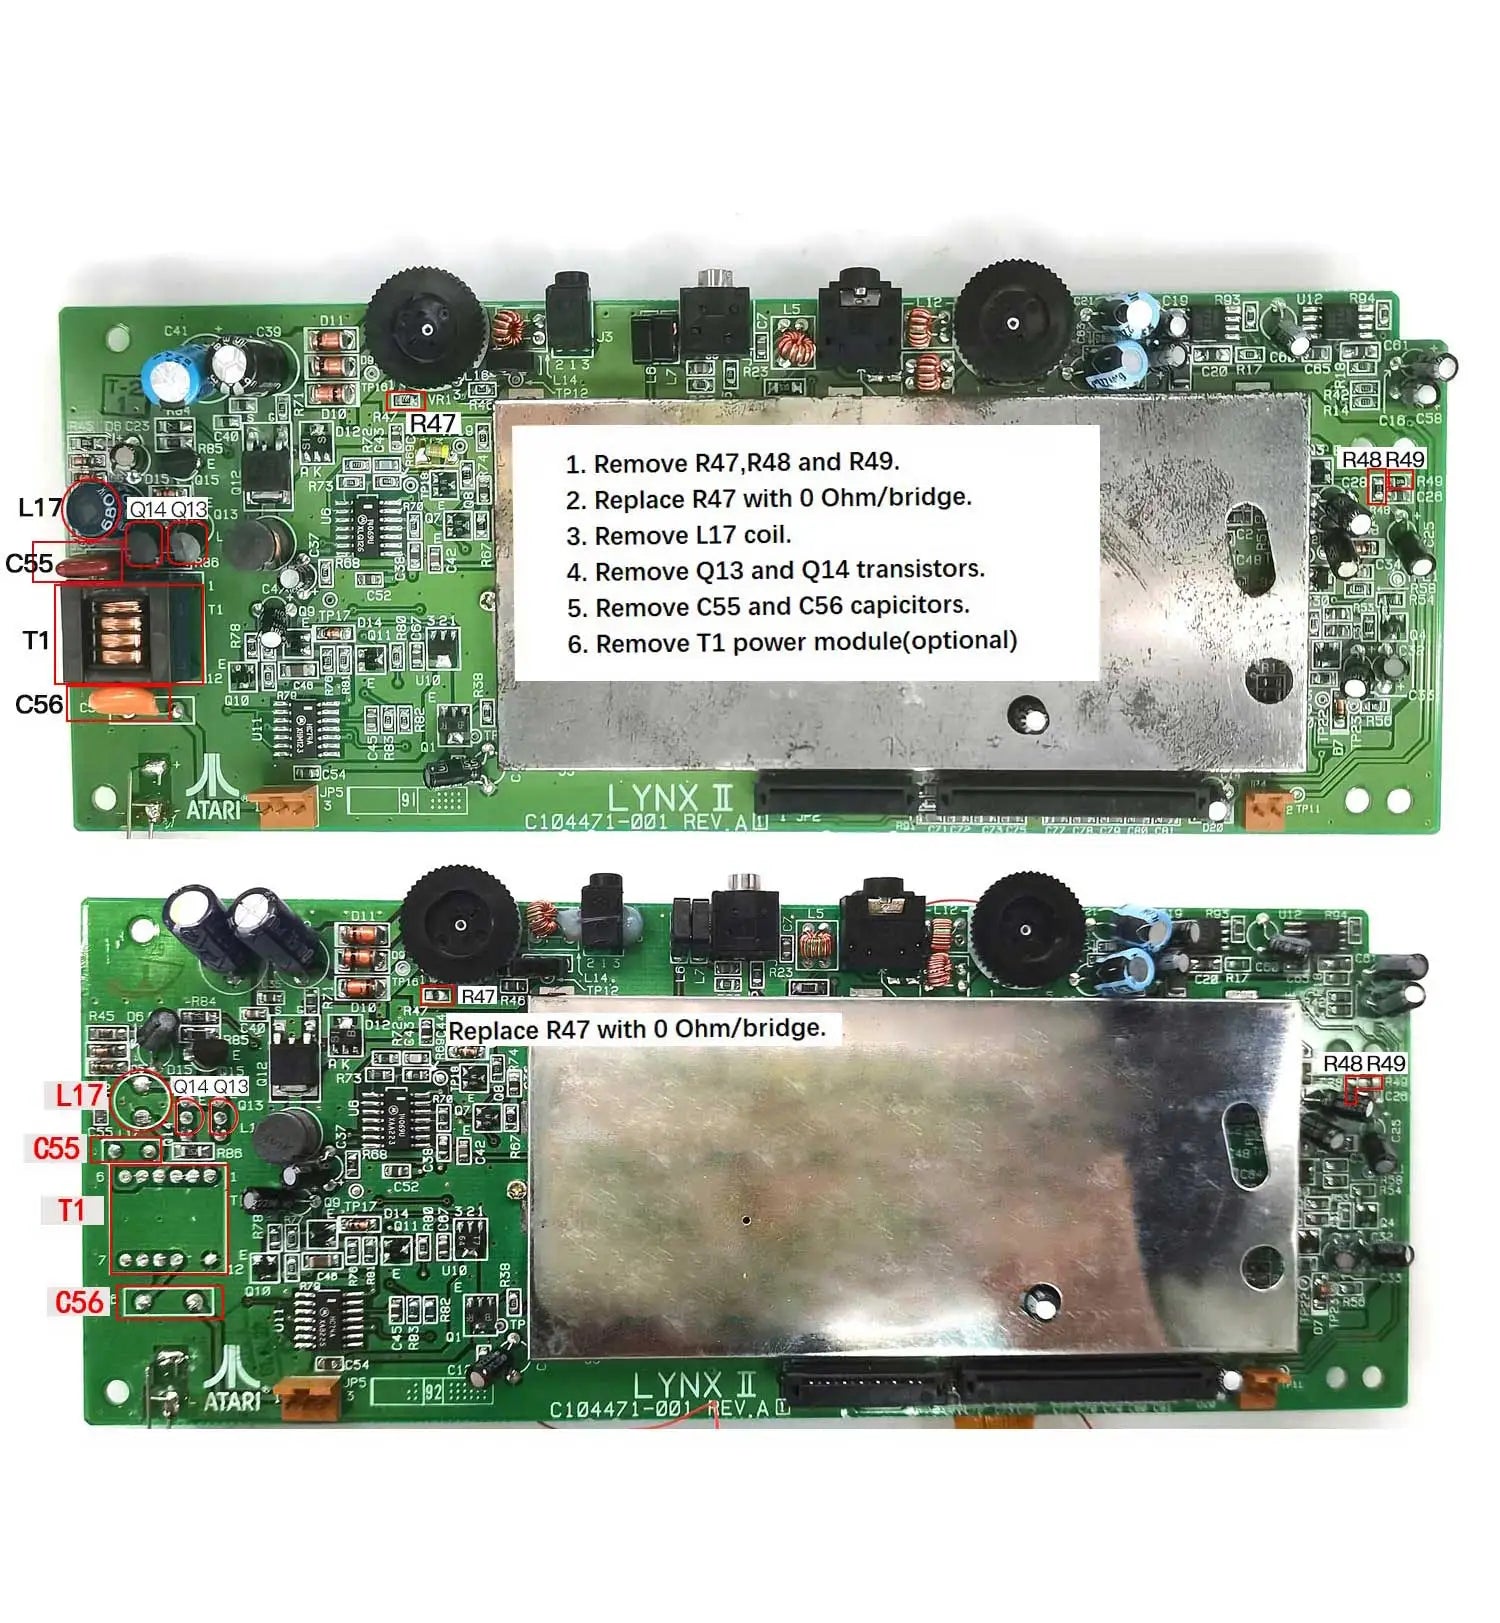
DOCUMENTATION:
- See product photos.
OSD CONTROLS:
- Press the Option2+A+B buttons for 1 second to activate the OSD Menu.
- Press the Option2 button to select the adjustment item when OSD Menu activated.
- Press the A or B button to adjust the item when OSD Menu activated.
WARNINGS:
- Test the kit before installation! Once the display is mounted with the included double-sided foam tape, it cannot be safely removed. We ask that you test the kit by hooking it up before removing the screen protector and before mounting the display using the foam tape.
Nintendo®, NES®, Super Nintendo Entertainment System™, Nintendo 64®, Nintendo GameCube®, Game Boy®, Game Boy Color®, Game Boy Advance®, Nintendo DS™, Nintendo 3DS™, Wii™, Wii U™, Nintendo Switch™, and all related names, logos, and trademarks are the property of Nintendo Co., Ltd. or its subsidiaries.
This product is an independent, third-party restoration or accessory product and is not endorsed, licensed, sponsored by, or affiliated with Nintendo Co., Ltd. in any way.
Why Choose our Store?
Fast Shipping
We know you’re excited to get your gear, so we ship fast—usually within 1-2 business day. With reliable carriers and tracking included, your order arrives quickly and safely, every time.
Great Support
Have questions or need help? Our knowledgeable team is here to assist with fast, friendly support. Whether it’s product advice or order issues, we’ve got your back.
Get in TouchTransparency
What you see is what you get. We provide clear photos, detailed descriptions, and honest specs so you know exactly what you’re buying—no surprises.
Store ReviewsRewards
Get more with every purchase. Join our rewards program to earn points you can redeem for discounts, exclusive offers, and more—just for shopping with us.
Rewards ProgramDeep Discounts
CLEARANCE