Bringing Classic Feel to Modern Play
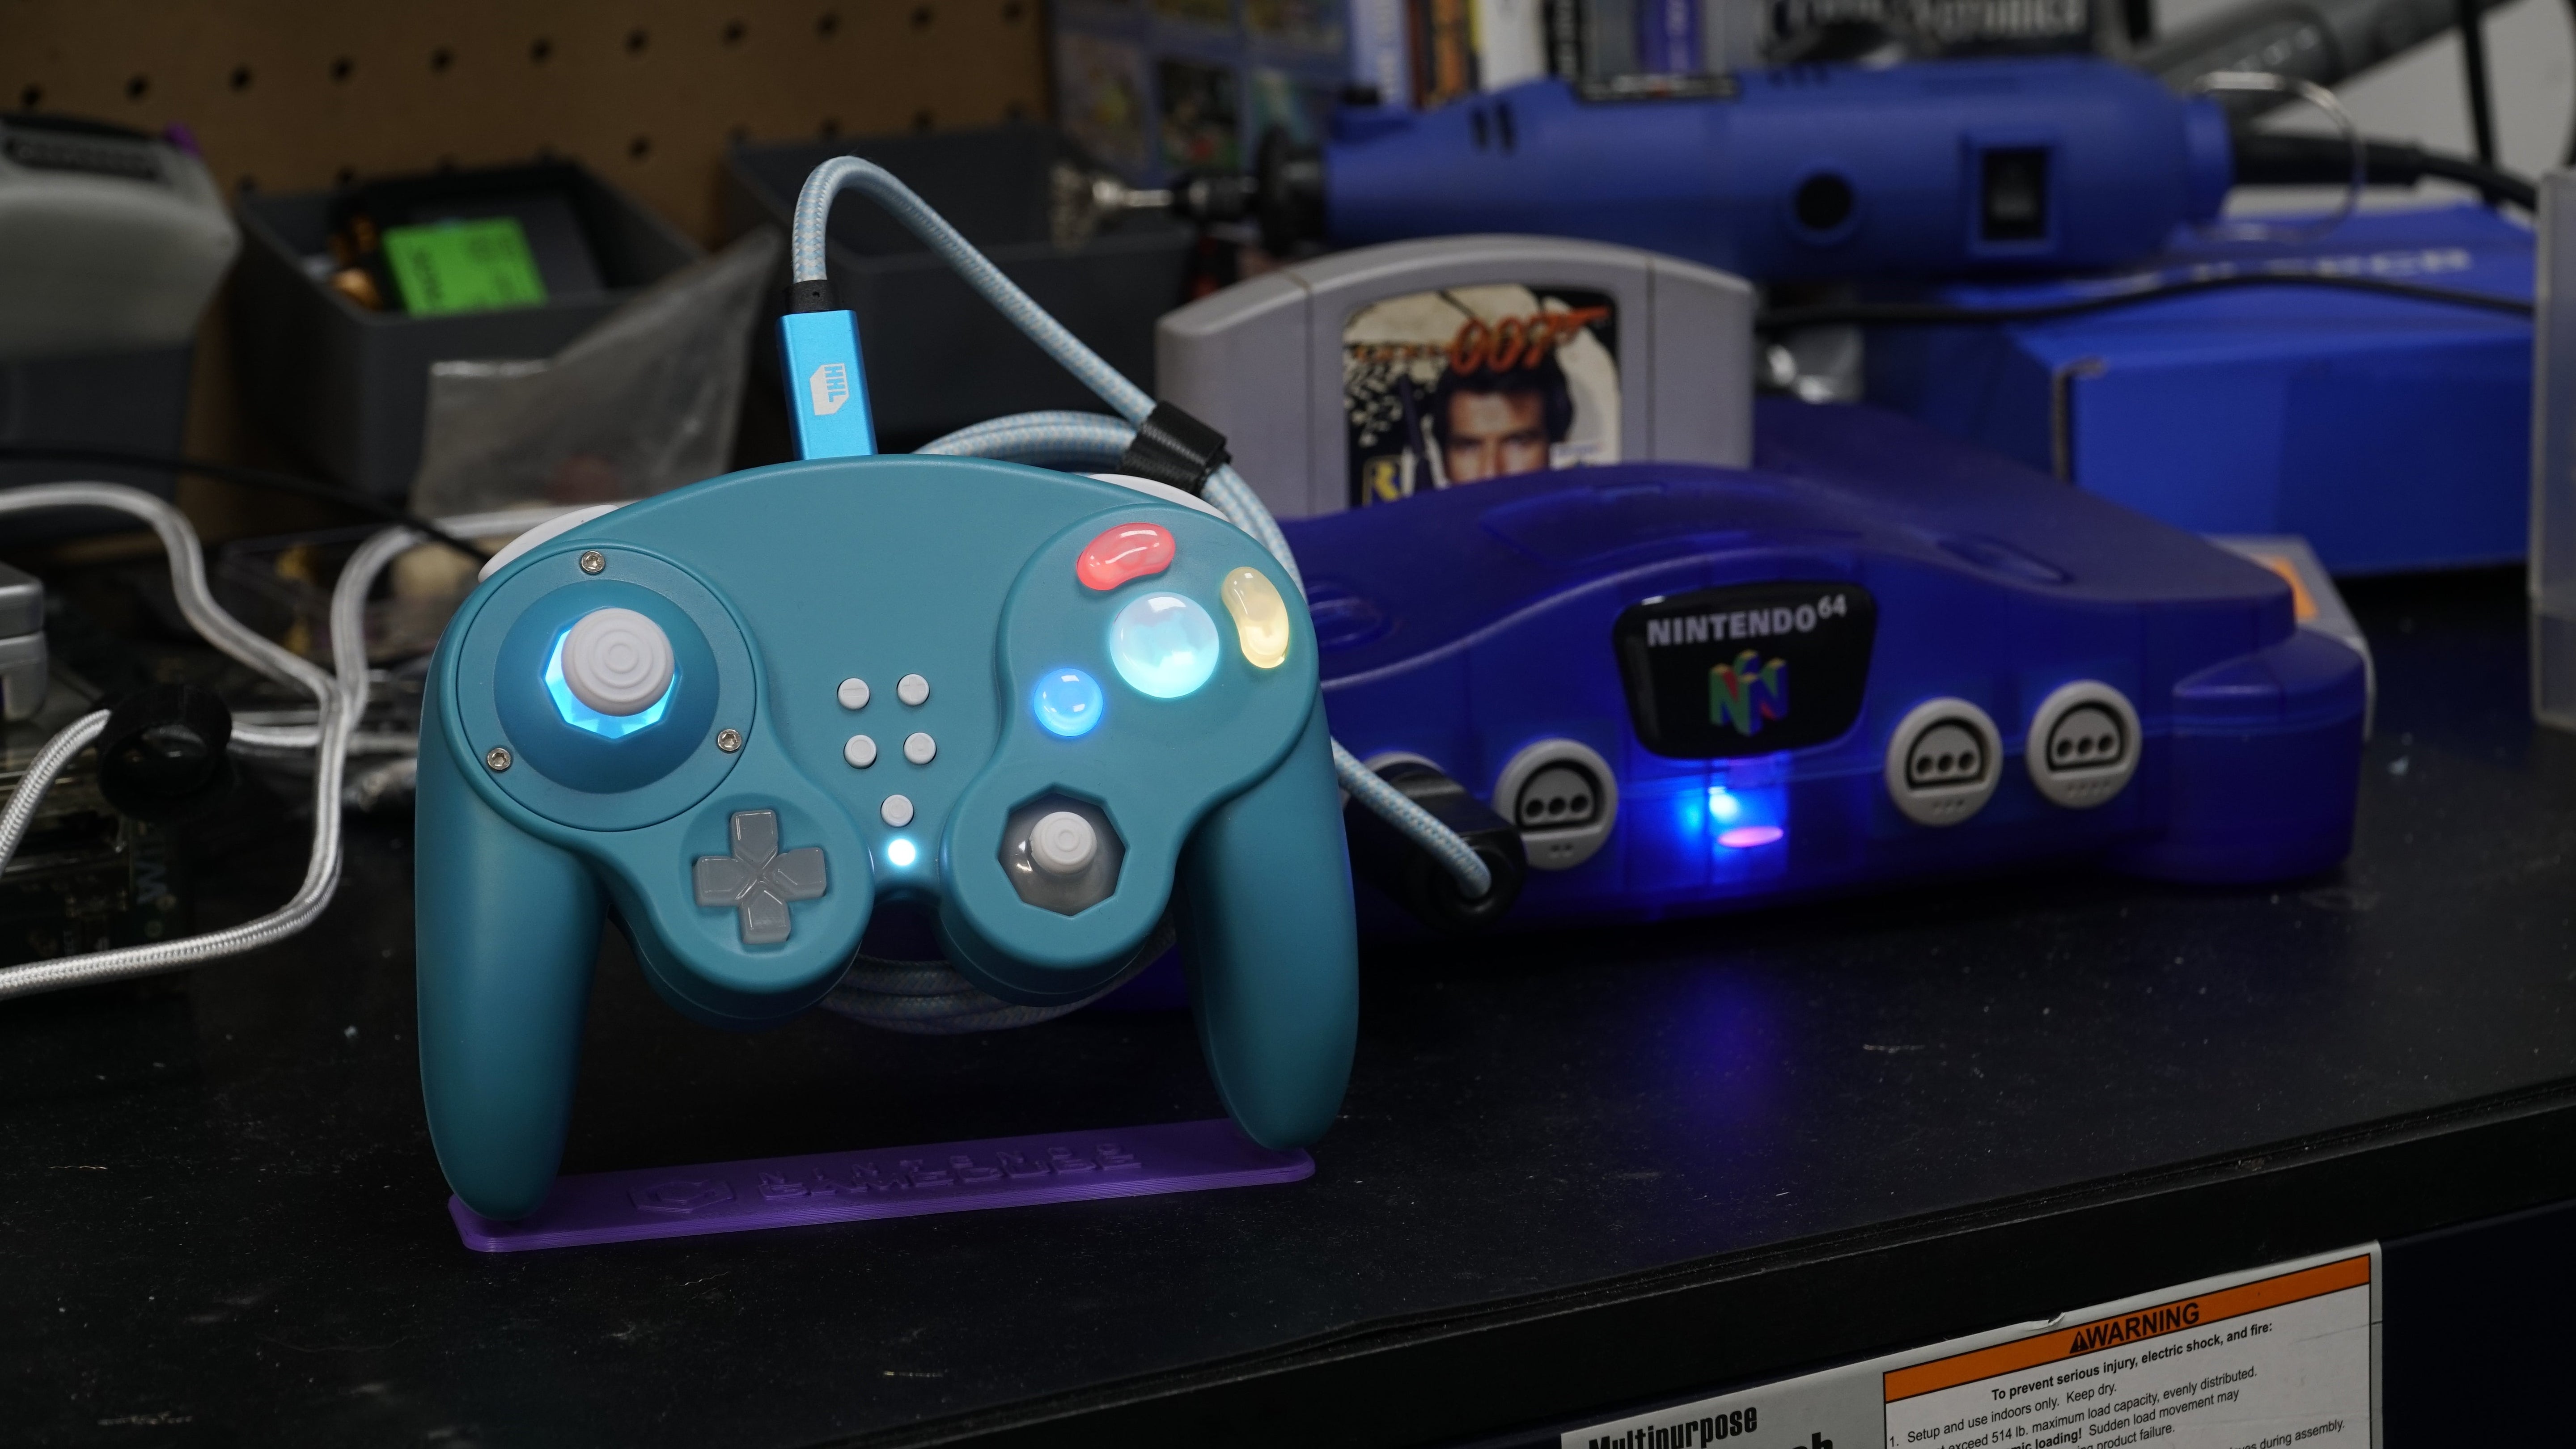
Looking for the best DIY GameCube controller kit on the market? The GC Ultimate Controller Kit is a premium, open-source solution that lets you build your own GameCube controller—combining modern features with the classic feel you love. This custom GameCube controller is compatible with Nintendo Switch, Nintendo Switch 2, PC, Steam, Android, and even retro consoles such as NES, SNES, N64, and GameCube.
Whether you're a competitive player, casual retro enthusiast, or controller modder, the GC Ultimate offers everything you need to create a personalized controller with Hall-effect joysticks, gyro, HD rumble, and more.
What’s In the Box – A Complete Build Kit
-
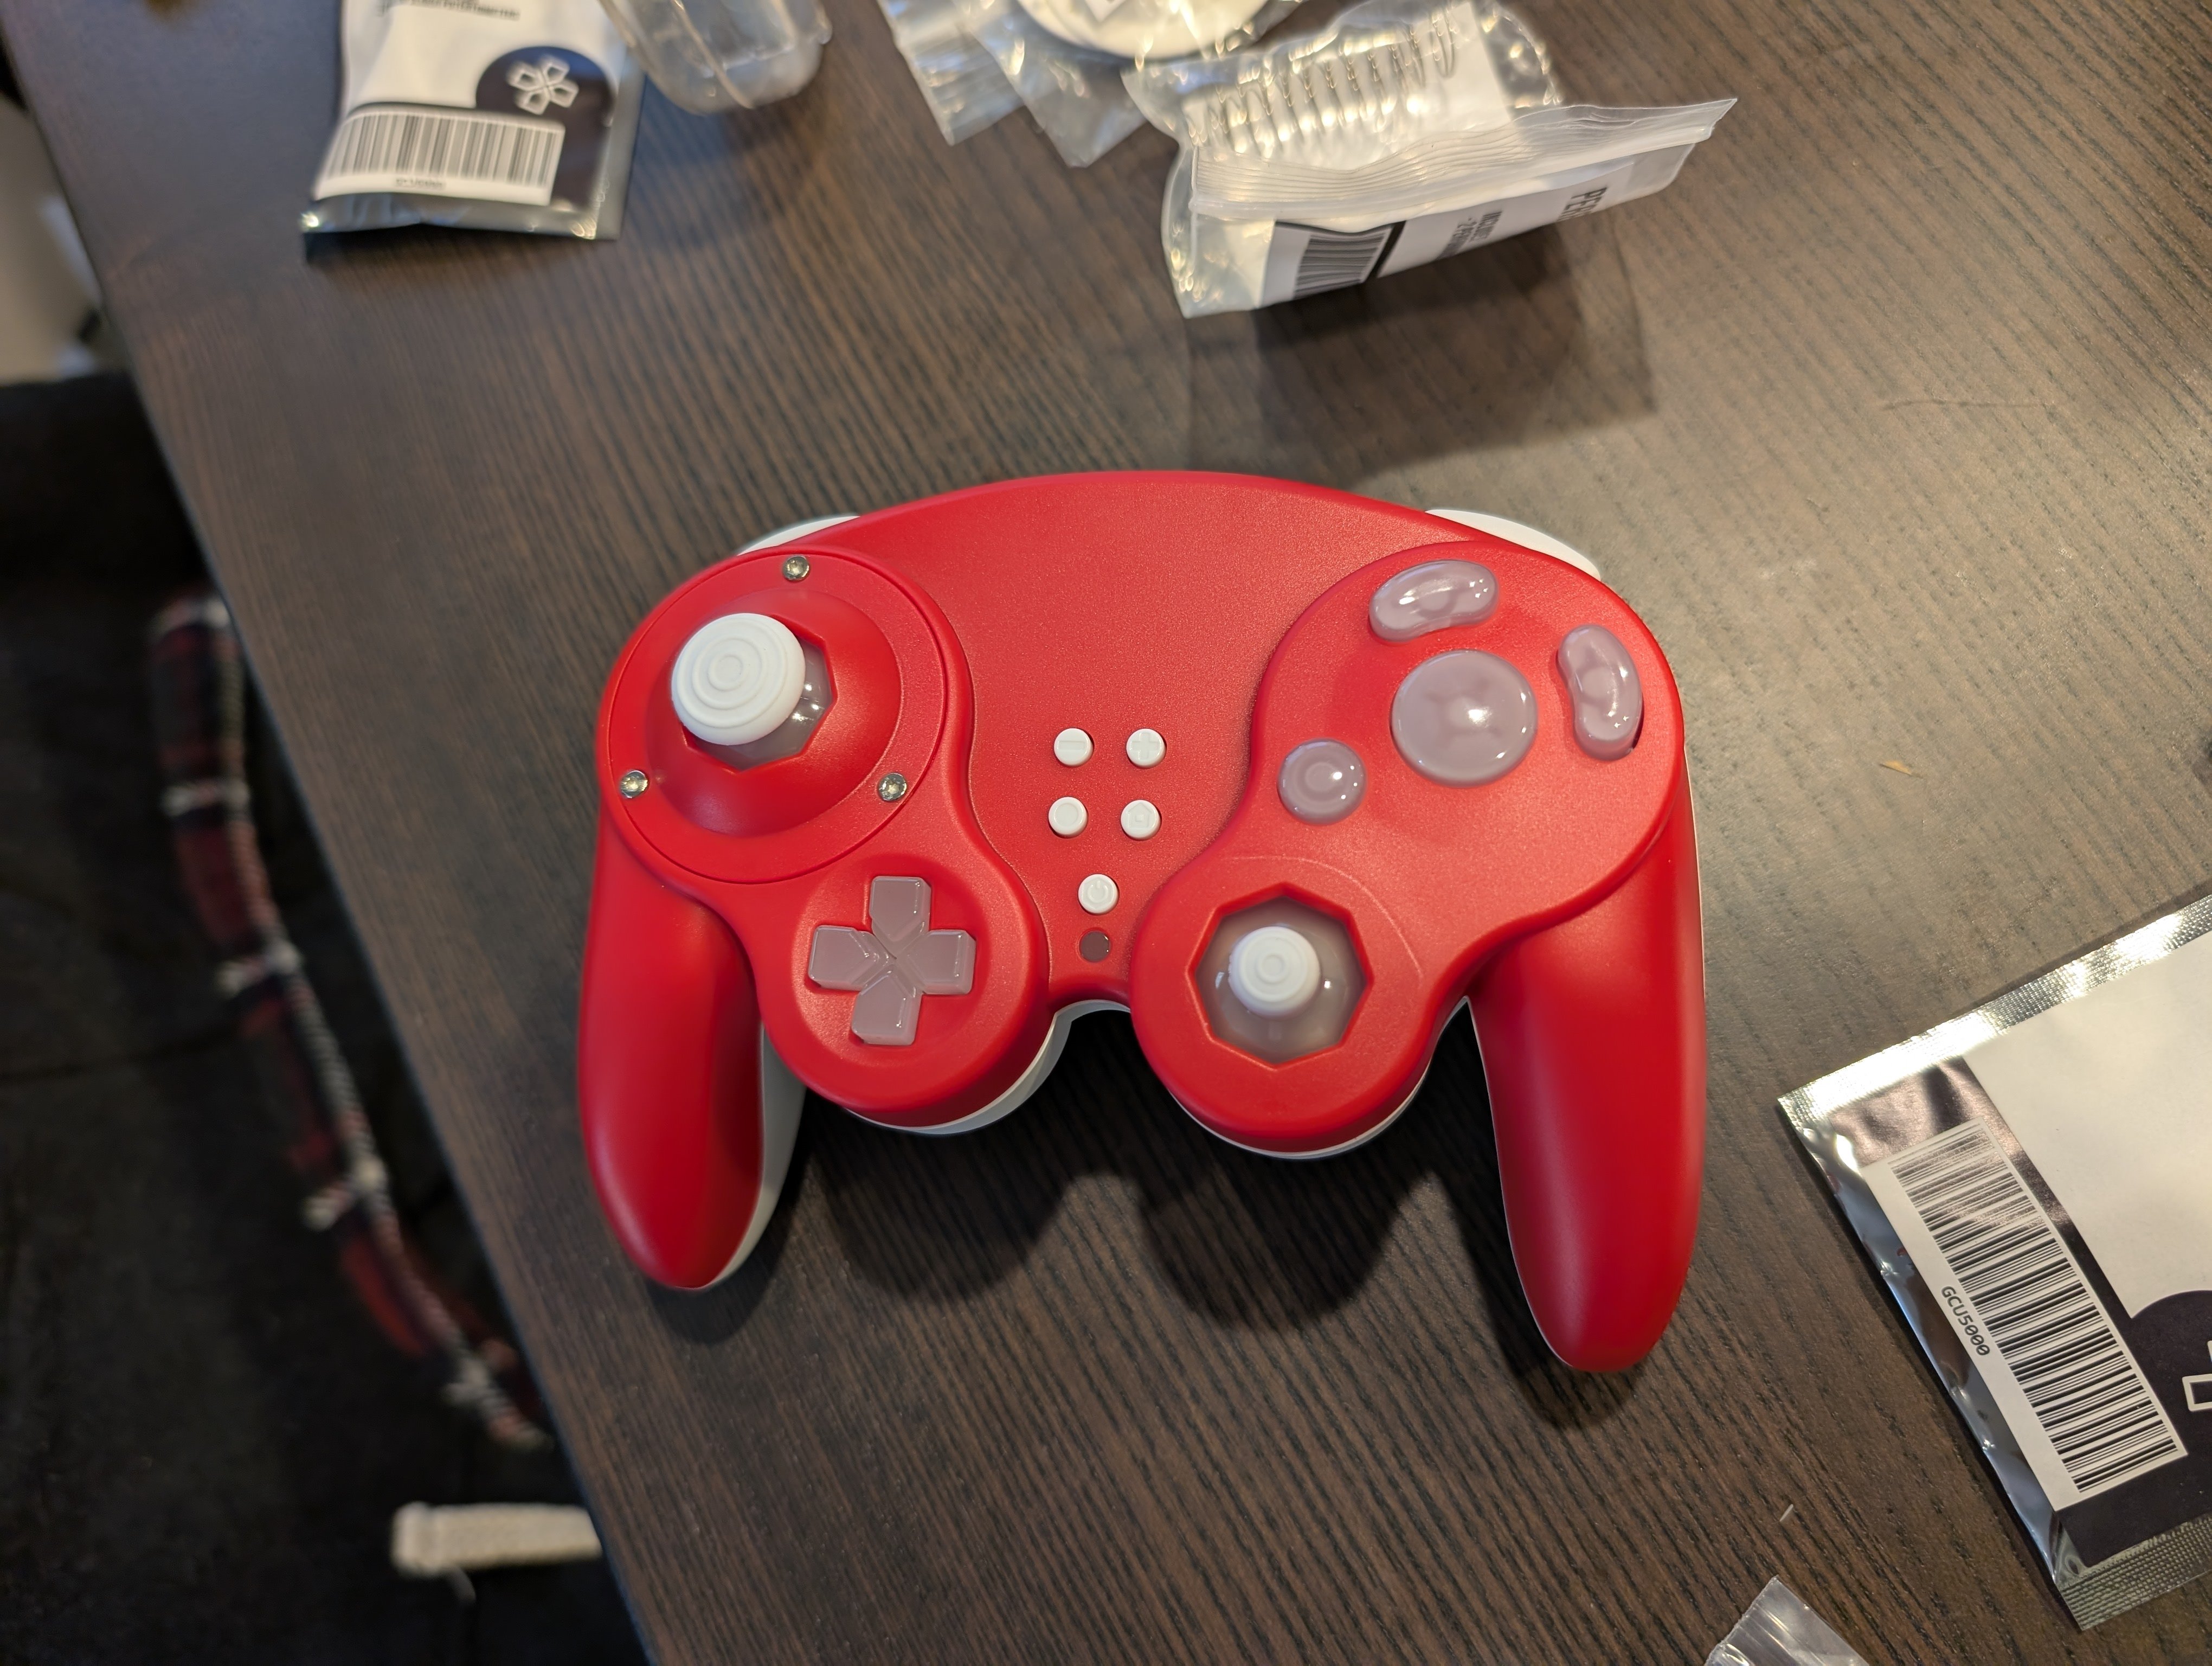
Full DIY parts kit: everything you need to assemble a working controller, including injection‑molded shell, gate plates, buttons, PCBs, etc.
Premium Hardware That Honors Tradition
Built with retro‑gamer fidelity and modern convenience:
-
1:1 footprint of the original GameCube controller
-
Hall-effect joysticks (Gulikit TMR) with stick‑click for drift‑free performance
-
Dual IMU sensor array for precise gyro controls (perfect for motion‑controlled games on Switch or Steam)
-
HD Rumble system for immersive haptics
-
Switchable RGB under‑lighting to customize your setup
-
Split D‑pad, crafted for improved control and wider compatibility
-
Dual Z buttons for added in‑game flexibility
- Swappable Octagon or Circular joystick gate plates to suit your grip style
Read This First: Build Precautions
Before watching or following along with any build video, read these notes in full.
Watch the entire build video before beginning your own assembly.
Skipping ahead could result in confusion or mistakes.
Screw Types & Tightening Guidelines
-
The T6 screws (smaller screws) are intentionally short and provide only a light grip on the internal posts.
-
These should be tightened just enough to secure the PCBs to the front shell.
-
Do not overtighten these screws — doing so can strip the plastic threads and compromise shell integrity.
-
-
The T8 screws (larger screws) are more robust.
-
These can be tightened more securely and will hold the two shell halves together with confidence.
-
Take your time and apply gentle pressure where needed. Stripping or overtightening can lead to long-term issues with shell fit or PCB mounting.
Haptic Actuator Installation Tip
To improve the feel of the HD rumble and ensure vibrations transfer properly through the shell, we recommend the following:
Use a Cotton Pad Insert
Cut small squares of cotton pad and insert them during assembly for better pressure and vibration transfer. These pieces sit between the haptic actuator and the shell wall to help ensure a snug fit and improved tactile response.
Example Sizes

Recommended Placement

Choose Your Build Style
Base Build: Analog Triggers
This is the standard build using pressure-sensitive analog triggers (perfect for titles like Super Smash Bros. Melee, F-Zero GX, Mario Sunshine, etc.)
Watch the full analog build video here:
Alternate Build: Mechanical Triggers
For a snappier, digital feel—great for fighting games or speedrunners—this option replaces the analog triggers with clicky mechanical keyboard switches.
Watch the mechanical trigger build video here:
https://youtu.be/8BTy2GuIois