Game Boy Color IPS LCD Q5 - HISPEEDIDO Shenzhen Speed Sources Technology Co., Ltd.

Shenzhen Speed Sources Technology Co., Ltd.

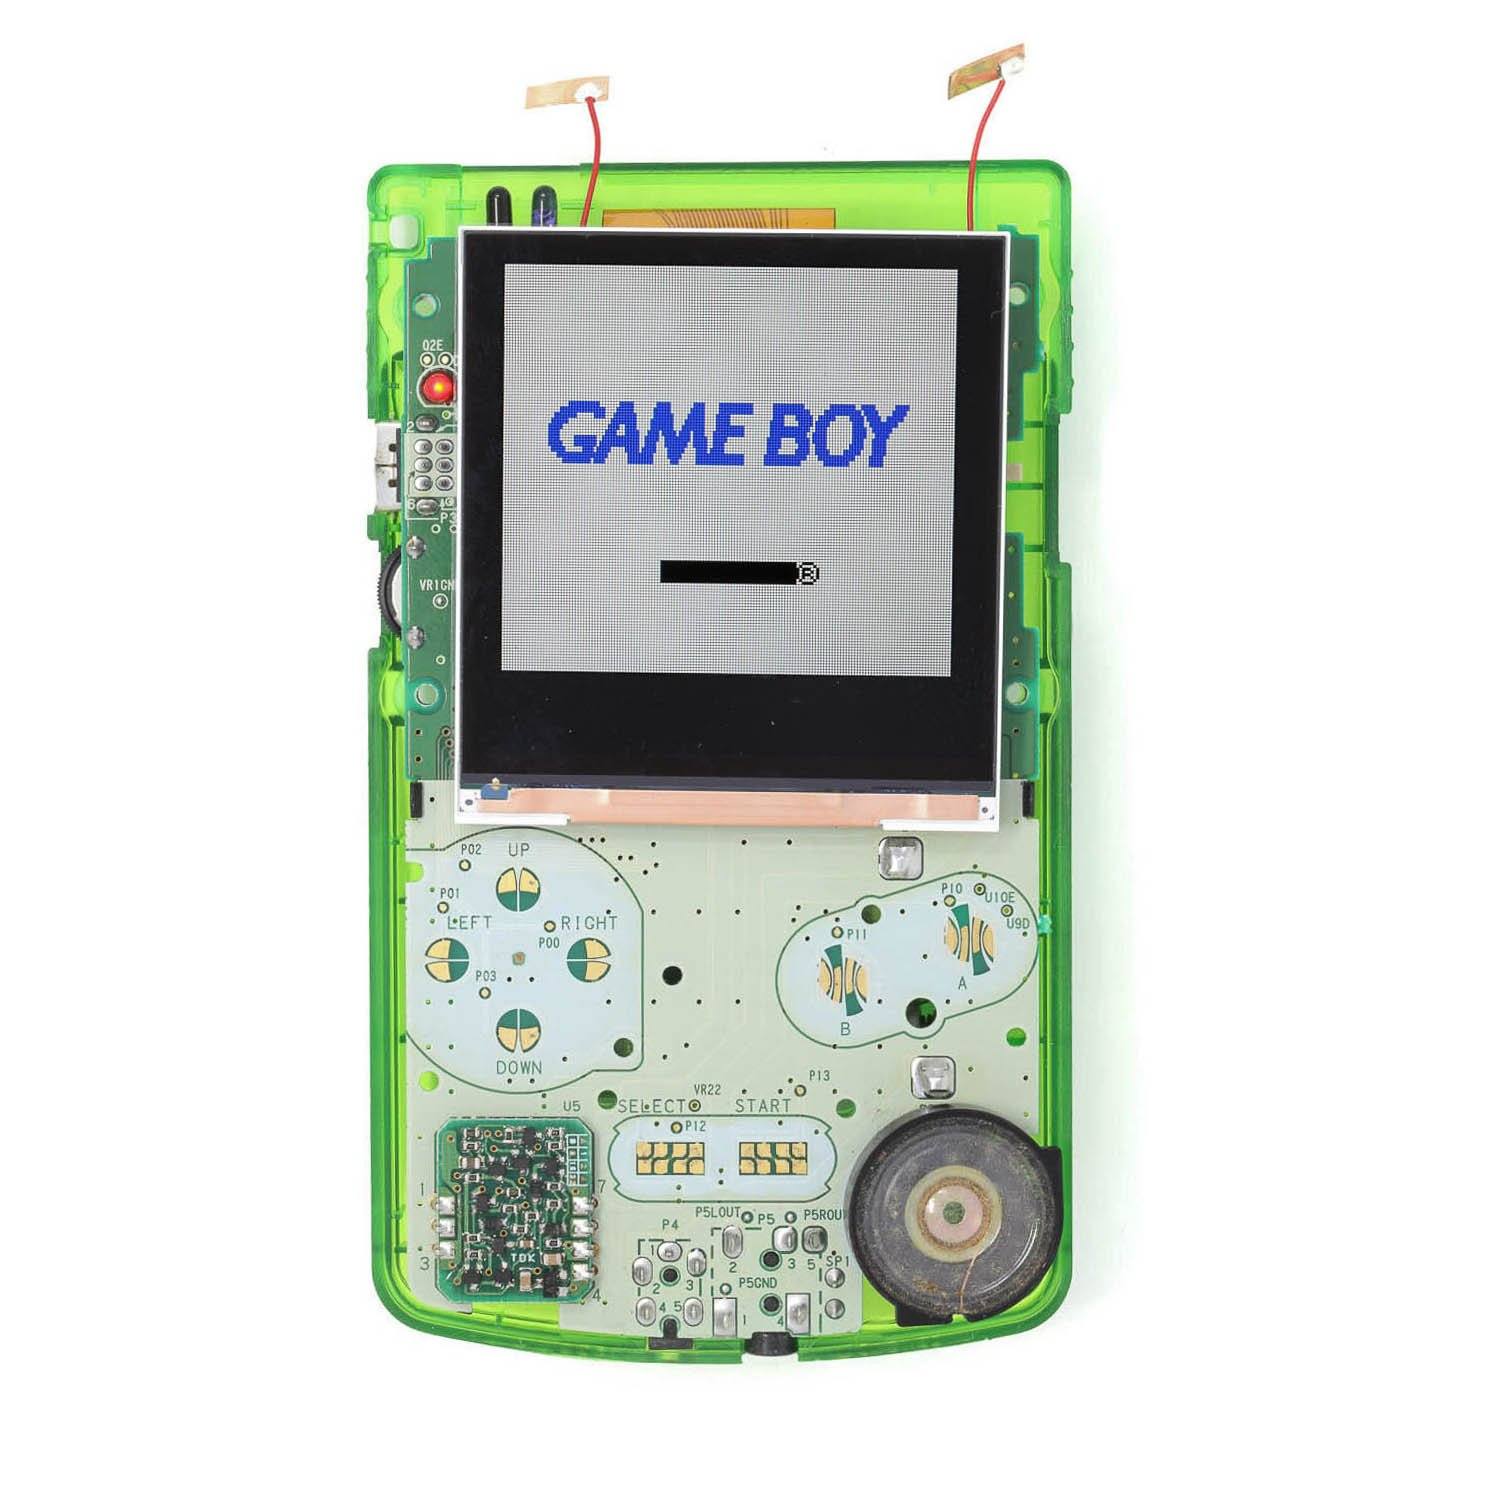
Game Boy Color Q5 IPS LCD Backlight Kit with OSD - Hispeedido

Sale price$59.99 USD
86 reviews
86 reviews
SKU: GBC4101

HISPEEDIDO

Quantity:
Pickup available at 519 Davisville Rd. Usually ready in 2-4 days

Game Boy Color Q5 IPS LCD Backlight Kit with OSD - Hispeedido

519 Davisville Rd.

Pickup available, usually ready in 2-4 days

519 Davisville Road
Willow Grove PA 19090
United States

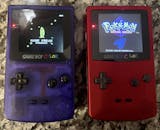
-Also known as the Q5 Super OSD Version, this IPS LCD for the Game Boy Color comes with improved function and on screen controls. Backlight and illuminate your beloved childhood GBC with a modern IPS LCD with improved color, contrast and viewing angle. 

FEATURES:

  • Display area is larger than the original. Shell modification required.
  • Custom glass lens required for appropriate masking of viewing window. Please purchase separately.
  • Brackets available for purchase separately.
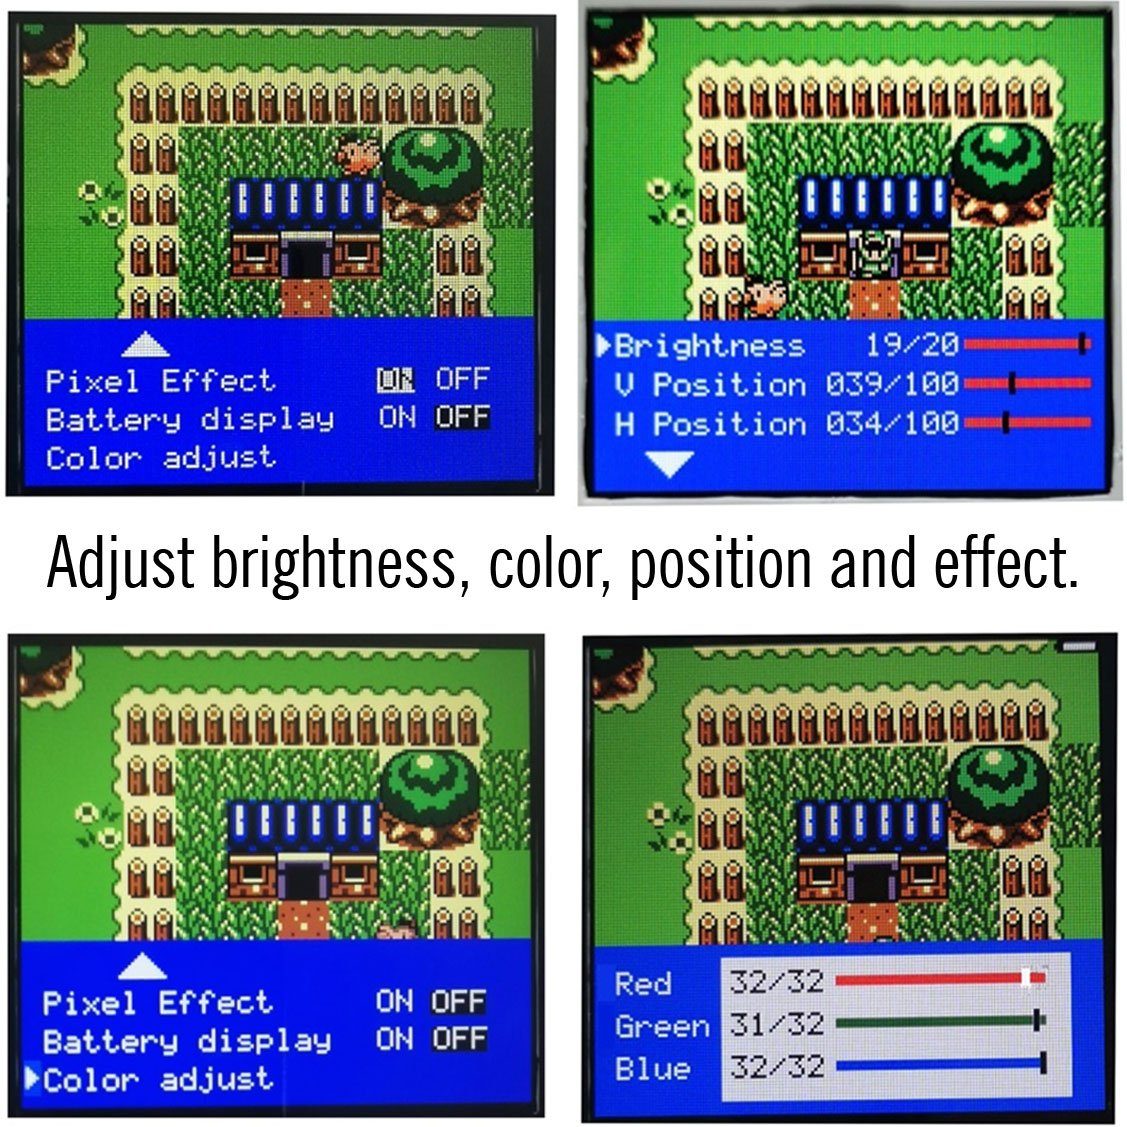
  • Built-in OSD Menu
  • Soldering required for on screen controls
  • On screen controls allow you to move the display window for perfect centering
  • The On Screen Display (OSD) menu has functions for Brightness, Vertical Position, Horizontal Position, Pixel Effect, Battery Meter, Color Adjust, and Factory Reset.
  • Use the Left touch sensor to change color, (Hold to turn on/off pixel effect) Use the Right touch sensor to change brightness, (Hold to turn on/off Battery display meter)

INCLUDED:

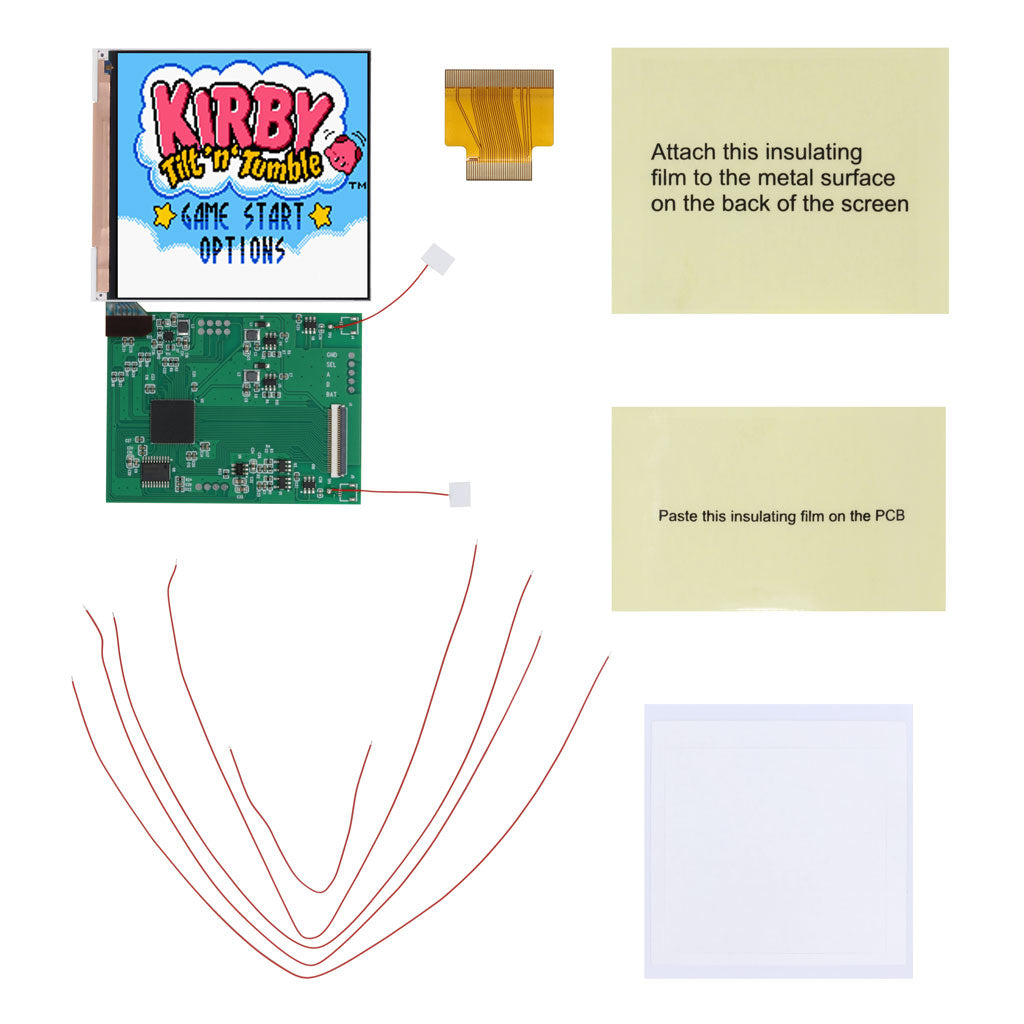
  • 1x Q5 IPS LCD
  • 1x PCB with two pre-soldered touch sensor wires
  • 1x Ribbon
  • 1x Adhesive
  • 5x Wires 
  • 2x Insulation films

PAIRS WELL WITH:

USING THE OSD:

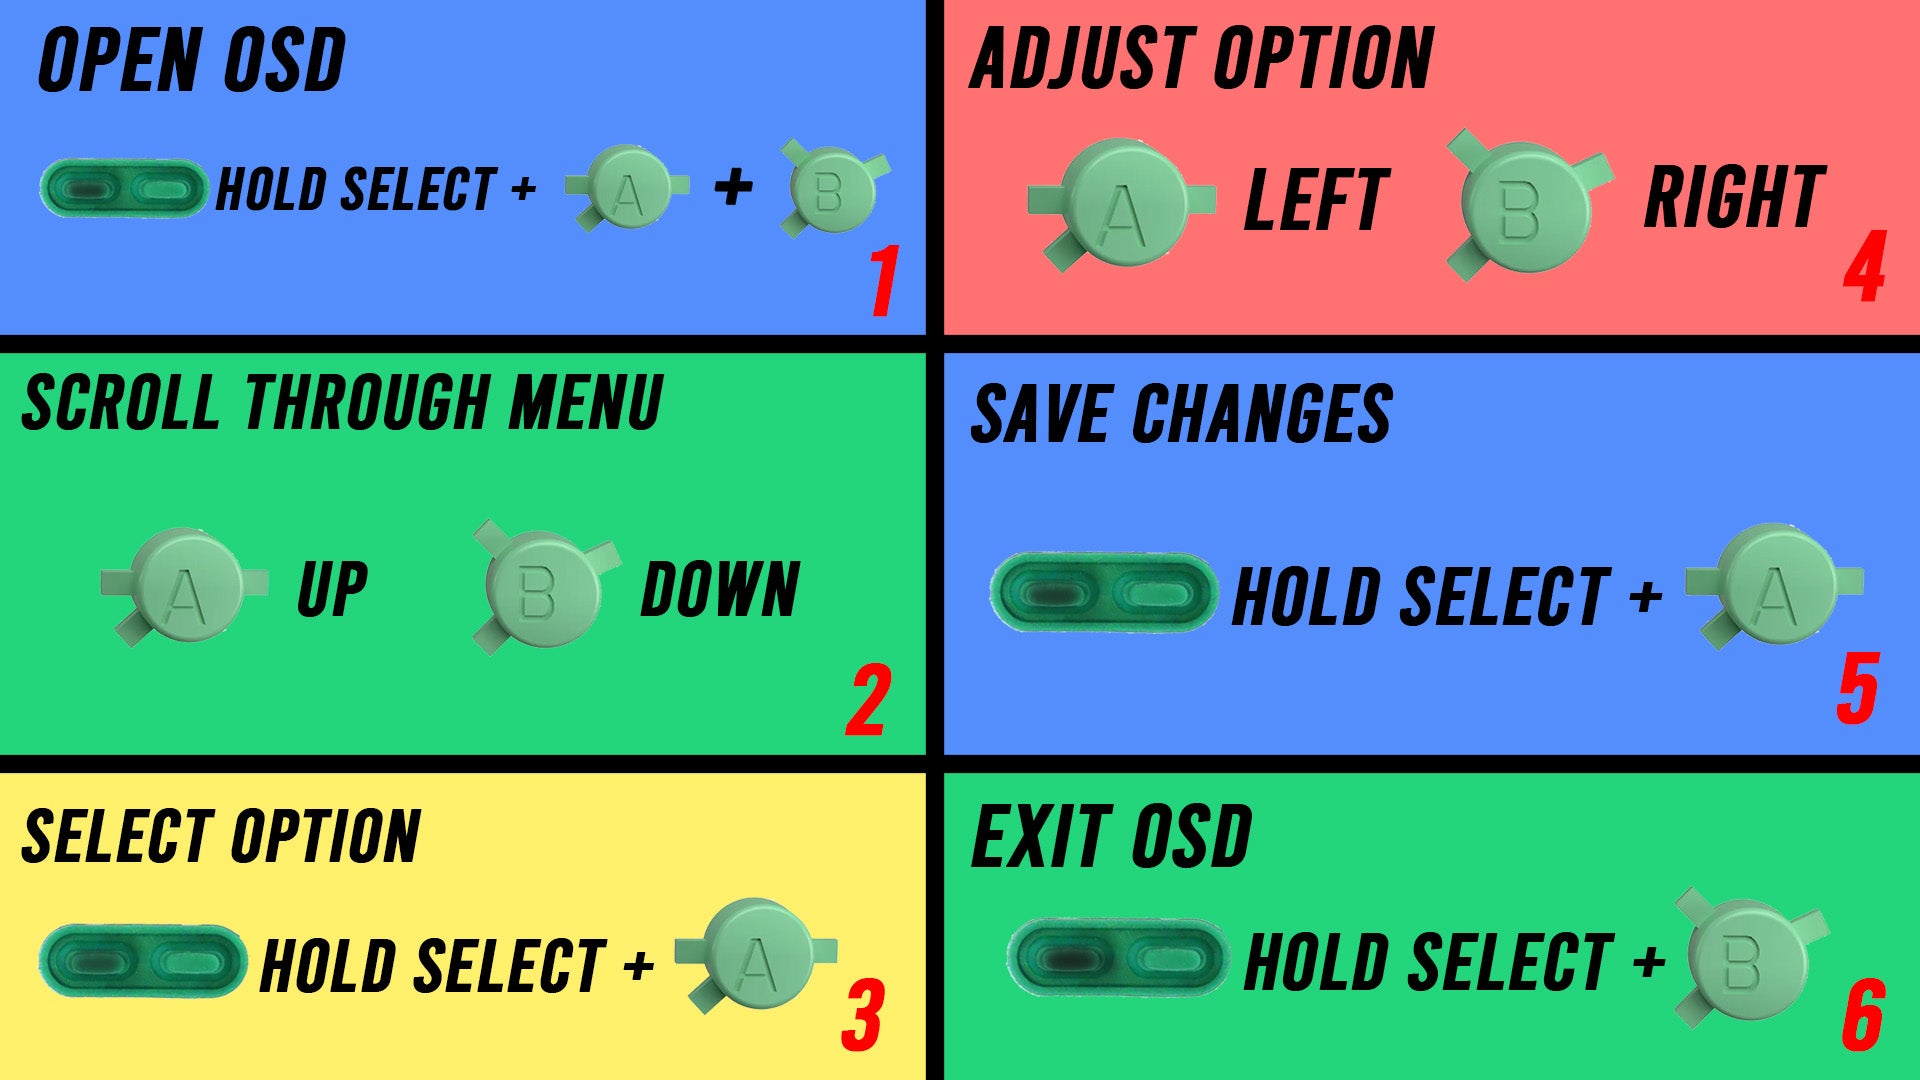
  • Hold Select and press A + B simultaneously to access the OSD menu.
  • Press A and B to scroll through the menu (A=Up, B=Down).
  • Hold Select and press A to enter a function.
  • Press A or B to set desired level (A=Right, B=Left).
  • Hold Select and press A to save changes.
  • Hold Select and press B to exit.

DOCUMENTATION:

NOTES:

  • After installation, if it is noted that your touch sensor is overly sensitive or is cycling, please see this article for assistance.

WARNINGS:

  • Test before installation! When you receive a backlight/LCD kit, you should perform a dry run before installing to assure that nothing has been damaged in transit. A dry run or test fit means the kit is not installed in the shell. This includes the use of adhesives, brackets, and any performed soldering. All ribbon cables should have no bends or creases in them. If you are unsure how to perform a dry run, please contact our support team and we will be happy to help. Backlight kits that have been installed are not eligible for replacement or return.
  • LCD may break if put under too much pressure or dropped. Please exercise extreme caution when installing.
  • Damage to console or LCD may occur if you do not trim the cartridge port pins. Exercise caution when trimming pins, wear eye protection to protect from pin debris when cutting the metal. Damage caused by these pins are not covered under our return or exchange policy. Trim the pins of your Gameboy's cartridge slot flat so that they don't interfere with any parts of the kit. We also recommend placing some Kapton tape over the trimmed pins to prevent any shorts.

    Customer Reviews

    Based on 86 reviews
    81%
    (70)
    10%
    (9)
    3%
    (3)
    0%
    (0)
    5%
    (4)
    J
    Justin M.
    lasted 5 days

    looked beautiful and was the best screen I ever installed until the screen's control board failed. Now the screen brightness is always sitting between 5 to 10% brightness, so dim you can hardly see it even in a totally pitch black room. The built in screen menu is still at full brightness, so it's an issue with the signal interpreter I think. the issue is persistent regardless of attached screen or motherboard.

    The screen is worth it if it doesn't fail, but keep in mind "test before installing" doesn't mean you have a good board.

    B
    Brandon
    Didn't last a month.

    Was a great looking display while it lasted. Been playing it daily for about 20 days and went to play yesterday with no screen response except a slight glow from the backlight. Changed batteries, disconnected and reconnected all connections, and still a dead display. Not sure if it's the ribbon cable or the display itself but it's pretty disappointing.

    B
    Bren L.
    I would not recommend this screen.

    Let's be clear, I have done many a difficult mod before, and this one is nothing out of the ordinary. The quality of this screen and install is very hit or miss. I wanted one after seeing the option of centering the screen and the size of it as compared to the freckleshacks or ags101 swaps. Did a CleanAmp1.1 as well as a Dehiss capacitor as well. When I fired it in the first time I got...nothing. Led didn't light up, screen didn't come on, no sound, nothing. Checked all my wires, nothing was touching anything it shouldn't. Solder was clean and well flowed to all I worked on. System worked fine before I opened anything up and was in great shape. I fiddled with it for a couple hours and got nothing. Never had a mod go south like that before. Hit road blocks but never had complete failure. I swapped a fresh untouched gbc board over to it to be sure, no mods or anything out to it, and this one worked fine as was....same result. Modding can be costly, and as such, I can't recommend this particular mod. Too much of a gamble I feel.

    B
    Brooke H.
    Wonderful Screens

    These are great screens. I've installed a couple at this point, and they're very much my preferred option. You do have to do some trimming and use the specific screen lens that is compatible with the increased dimensions of the screen, but the smaller bezels and greater screen real estate are very much worth it and make the device look even more modern. Well, as modern as a GameBoy can, anyway! I hope to see more screen lens options as well as pre-made shells for the correct dimensions in the future.

    The only thing I would change would making the on-screen menu a bit more intuitive to navigate. Pressing Select + A + B to bring up the menu is fine, but the actual method of navigation takes some getting used to. This is less of a problem if you're using the included touch sensors, but I ended up removing them from my unit as I found I accidentally triggered them frequently. Being able to use the directional pad to navigate the menus would be nice. It would require additional soldering, but since you're already doing some soldering to the ribbon connector anyway, a few extra wires would be worth it in my mind.

    One thing to note as well is that the brightness on the displays, at least those that I have received, is not entirely even. It's typically brighter in the bottom right-hand corner of the display. This is mostly noticeable when the screen is dark, and I wouldn't consider it a reason to avoid purchasing these screens.

    Overall, as long as you don't mind doing a bit of extra work to get your shell where it needs to be for this screen and are okay with just having the two design options for a screen lens, I think it's a clear winner in terms of the options available at the time of writing this in February of 2021.

    V
    Víctor P.H.
    Excelent product, works with all Turbo frequencies!!

    I tested it with all different crystal oscillators, different frequencies, and works fine.
    I set my game boy color with 24 MHz and the battery icon sometimes flicker. But the color and luminosity are perfect.

    B
    BowserN64
    Fantastic And Very Bright Screen, Easy Install, No Soldering Required For Pixel Grid!

    Absolutely awesome screen! It's so nice to be able to play my games and see what I'm DOING! Installation was a breeze once I knew what I was doing! Very impressed that I can hold the left touch sensor to enable/disable the pixel grid function too! A great quality product! Just keep in mind this screen is huge, so it will come down to the edge of the D-Pad on the back face of the front shell.

    Nothing can ever be fully summed up with words, so I have a whole video about my experiences with this amazing screen, including the unboxing, installation, testing, and playing with it!

    Judge.me YouTube video placeholder