Game Boy Advance ITA TFT Backlight Kit - FunnyPlaying
FunnyPlaying
Game Boy Advance ITA TFT Backlight Kit - FunnyPlaying
Hand Held Legend
519 Davisville Road
Unit 102
Willow Grove PA 19090
United States
Choose options
FunnyPlaying
FunnyPlaying
FEATURES:
- At the lowest brightness, the kit power consumption is 0.15w. Less power consumption than other IPS kits.
- It has the same display effect as AGS-101, without ghosting, better colors and brighter backlight.
- Ideal if you want a brighter display but want to keep the original pixel size.
- Natural pixel grid scan lines
- It has a memory brightness function and can adjust the partial display window.
- Adjustable brightness VIA touch sensor, button presses, and OSD menu.
- Suitable with OEM/Standard sized screen lenses
- OSD menu VIA button presses or touch sensor.
- OSD menu options include brightness (BRT), Frame Blending (FRM), and X and Y Axis adjustments (XST - YST).
INCLUDED:
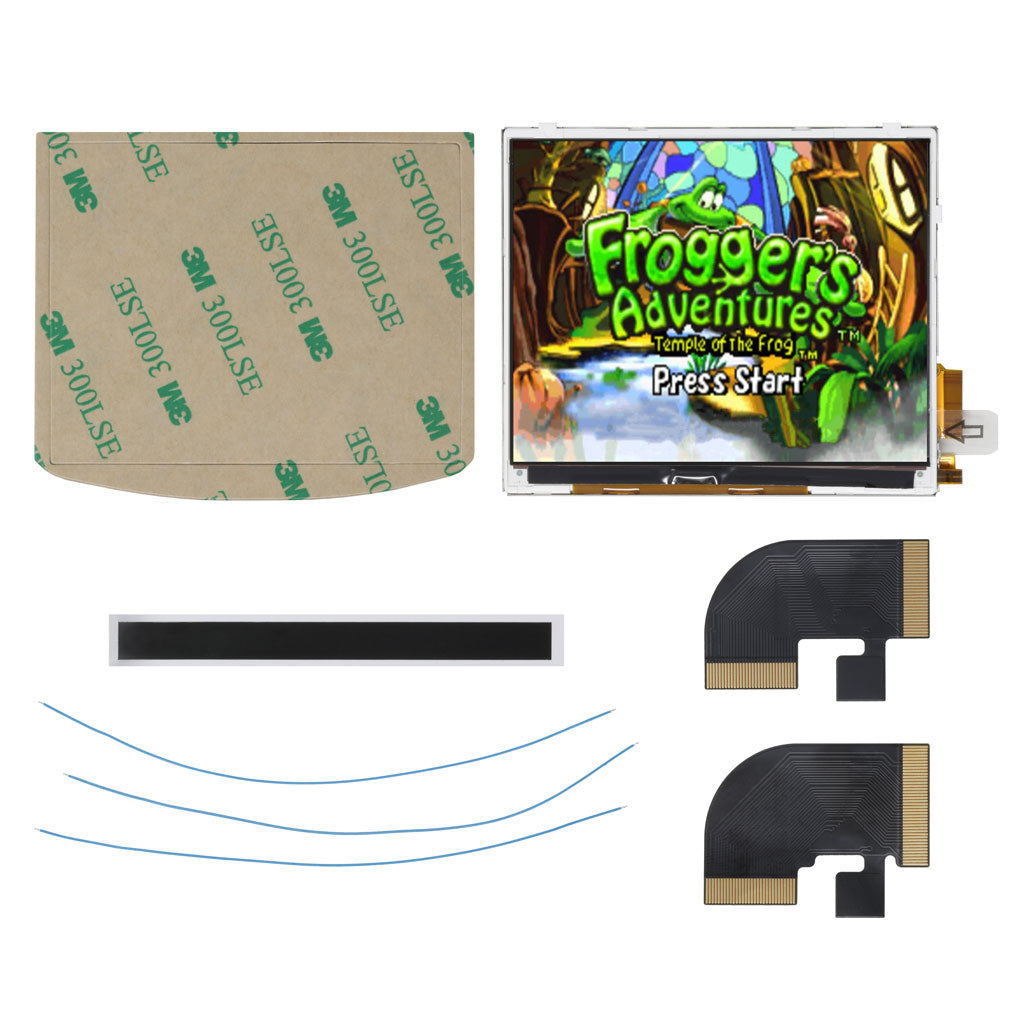
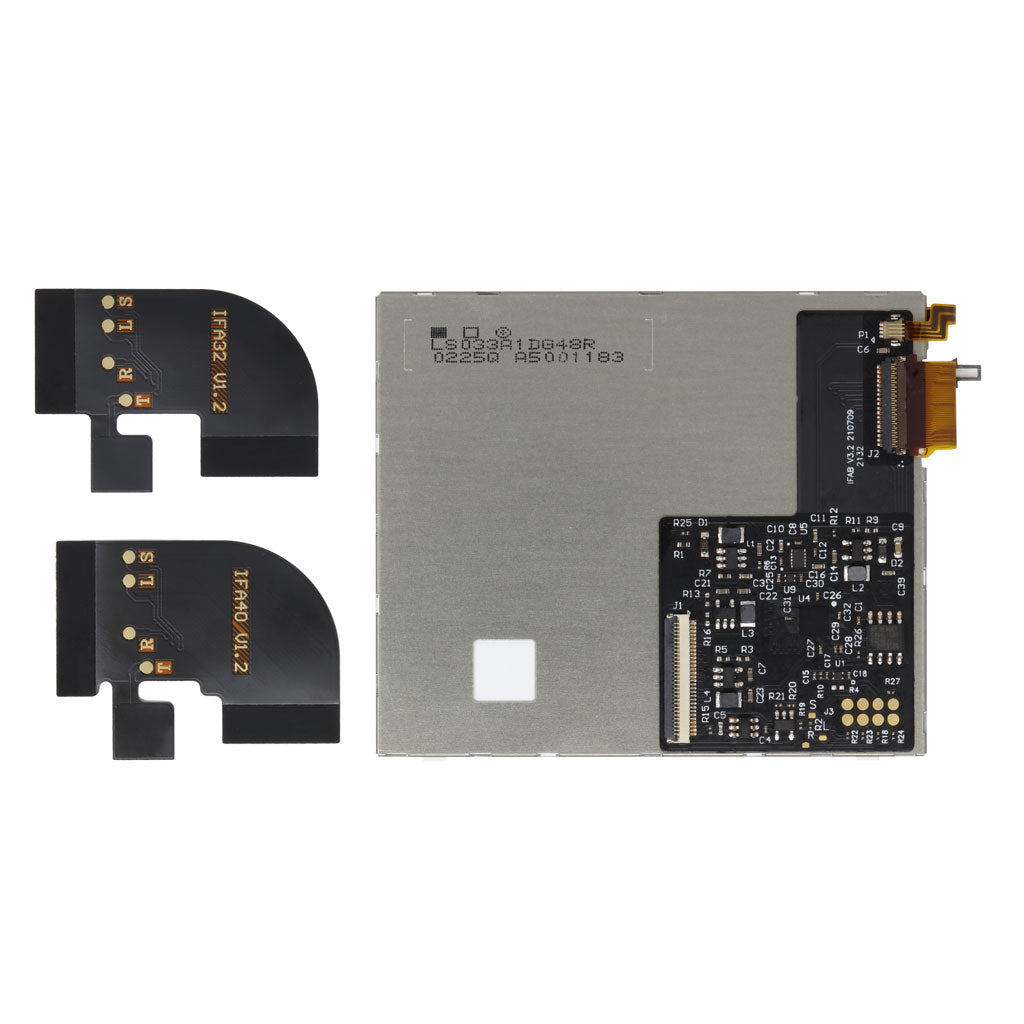
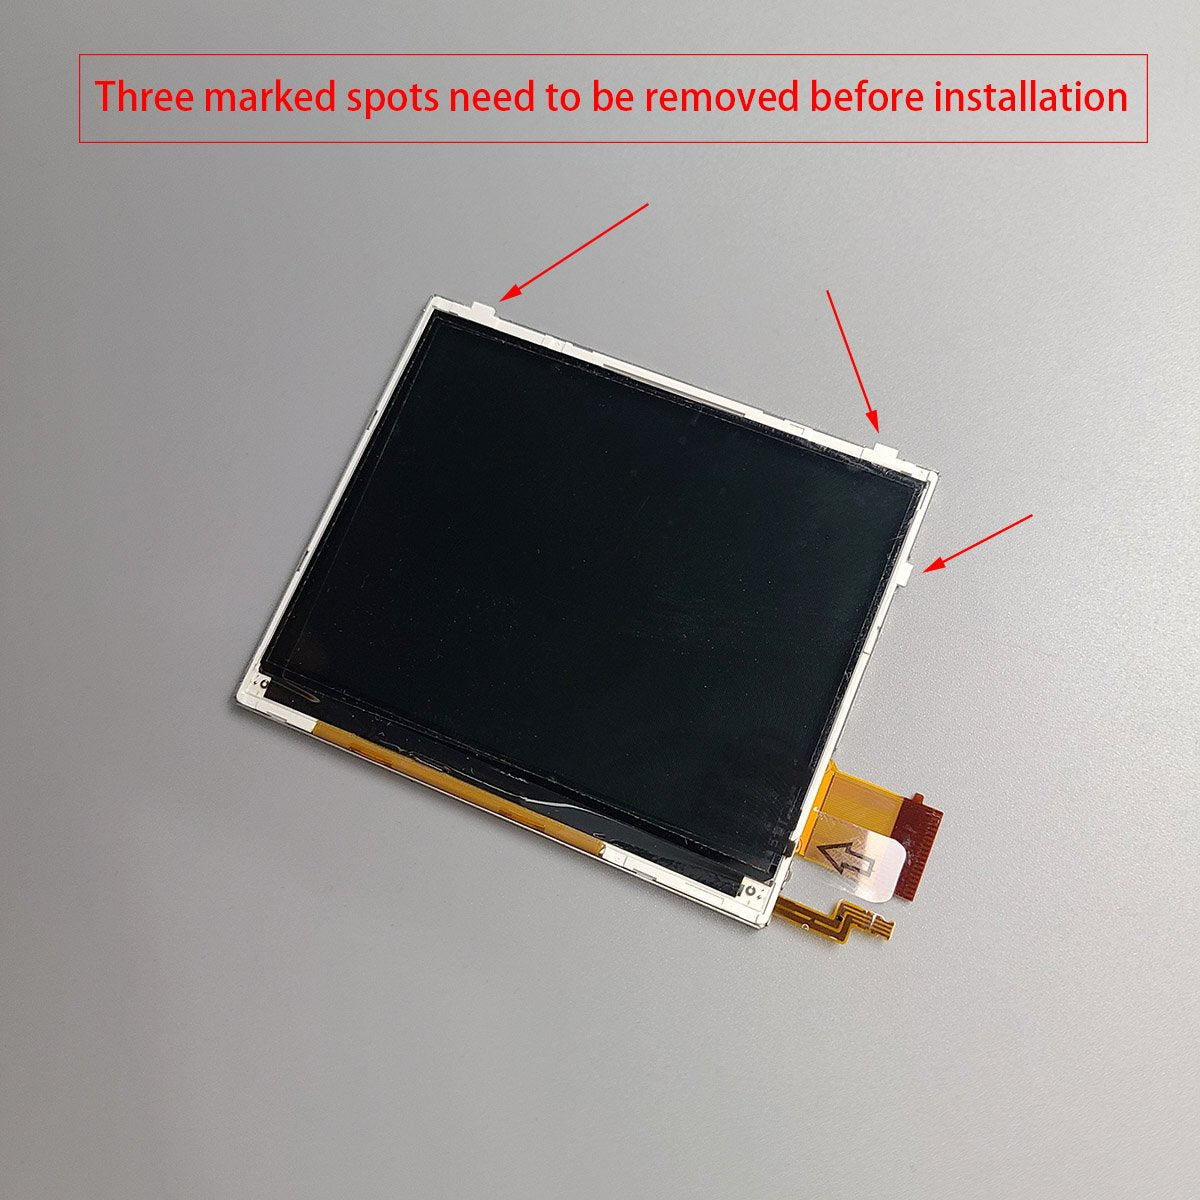
- 1x TFT LCD (DSi Lower) with adhered PCB on back
- 1x 32 pin ribbon
- 1x 40 pin ribbon
- 3x Wires
- 1x Adhesive
- 1x Insulation film strip
PAIRS WELL WITH:
- Game Boy Advance IPS/ITA Shell
-
Game Boy Advance Buttons
- Game Boy Advance Tempered Screen Lens - Original Size
DOCUMENTATION:
NOTES:
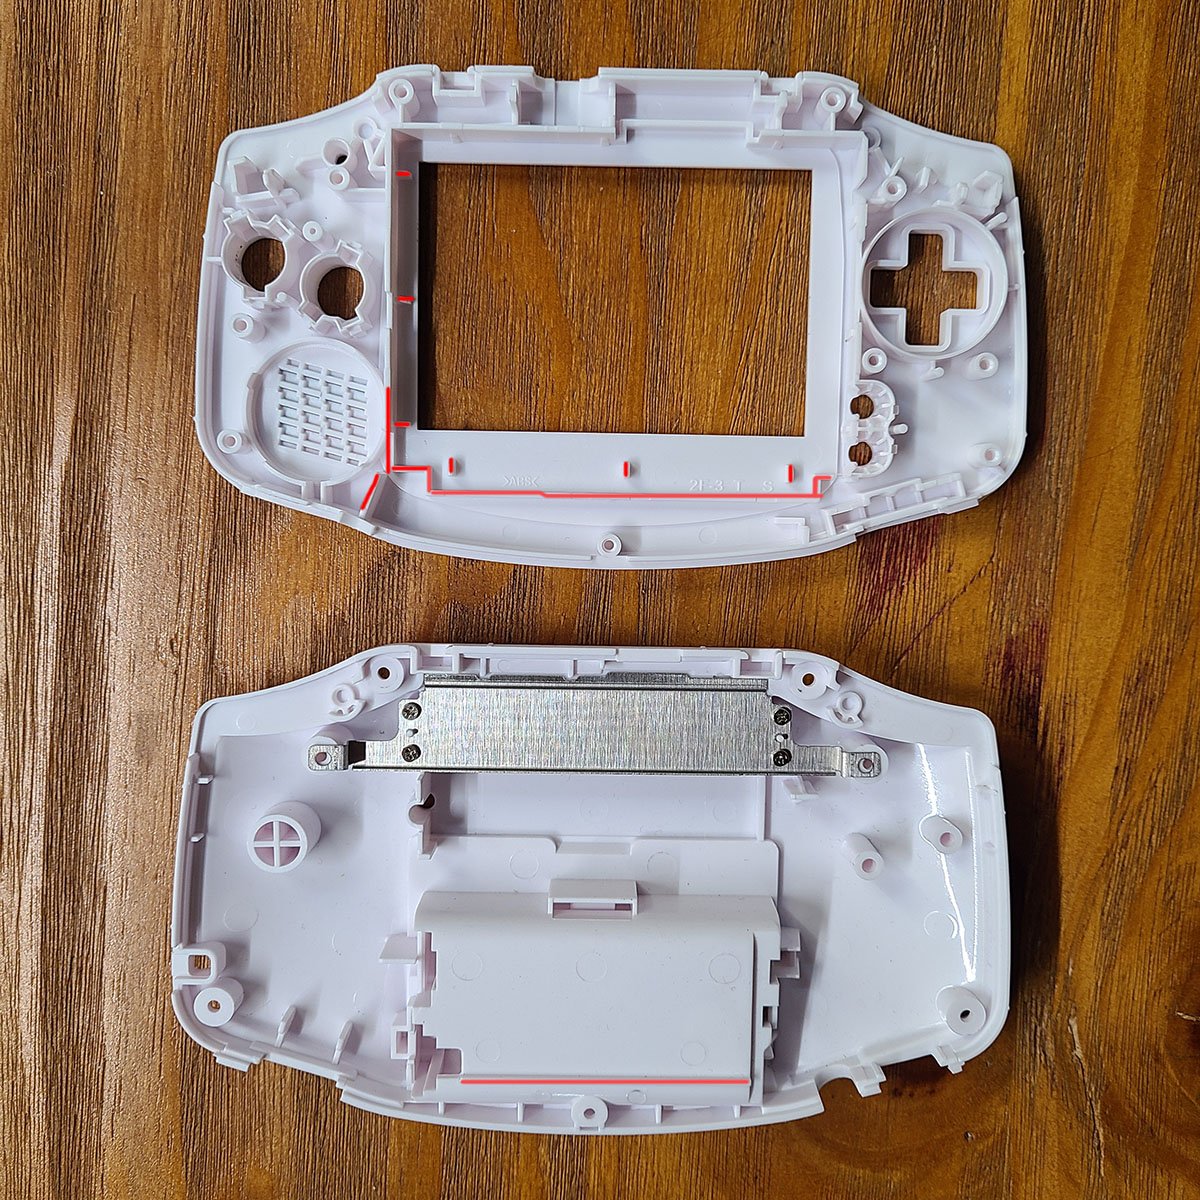
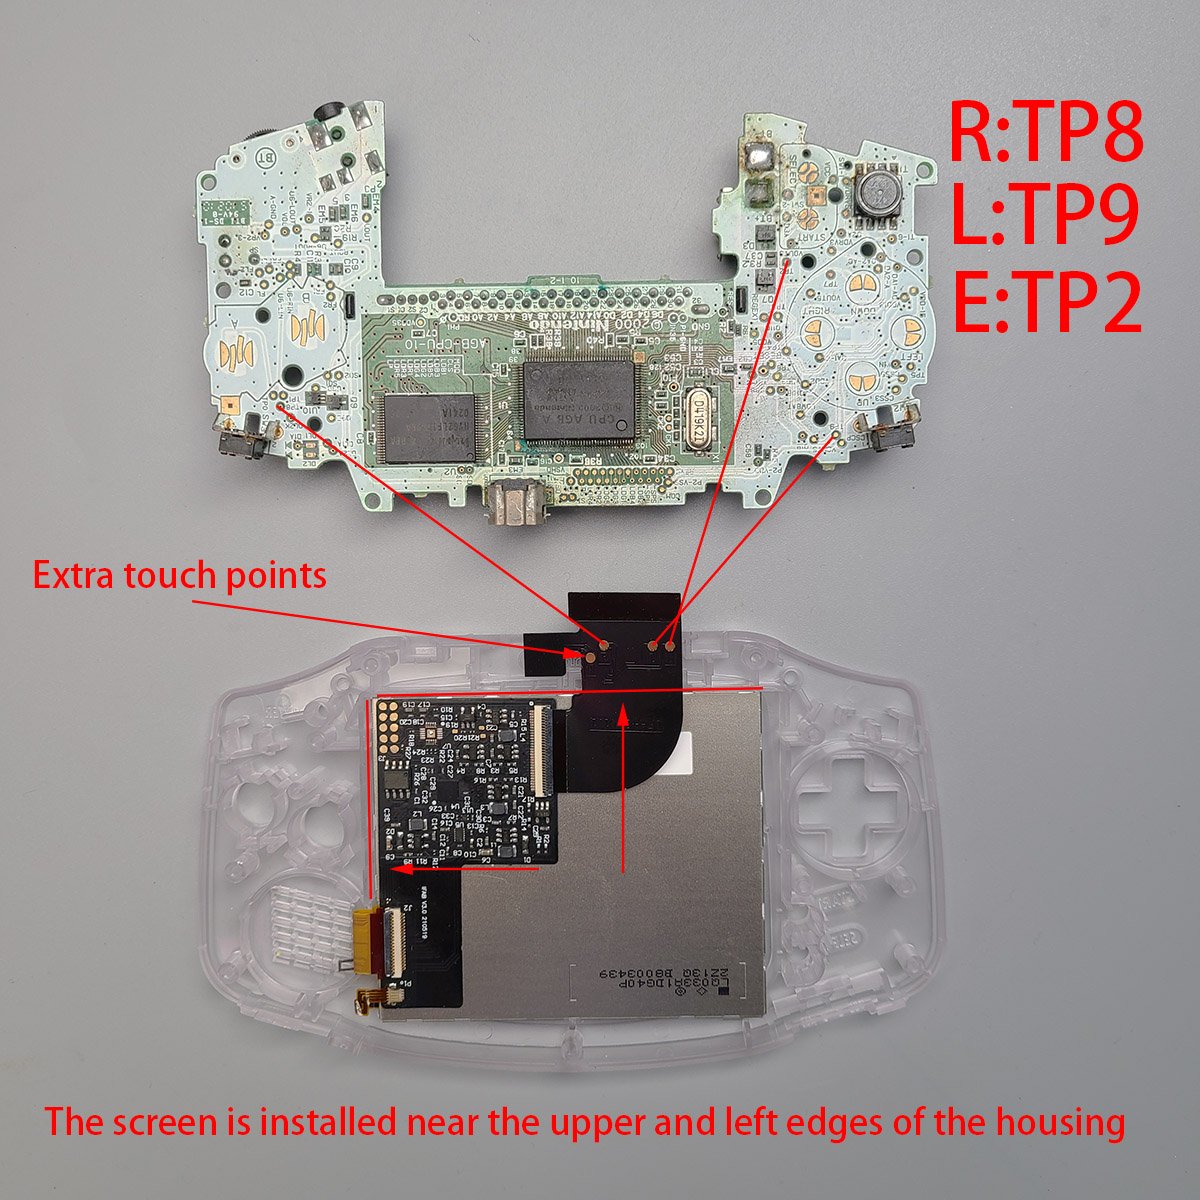
- Shell modification requires cutting the inside of shell but not the viewing window.
- If you adjust the display window, you need to weld the select L R key.
- Good viewing angle, but not as prominent as IPS.
- The original lens can be used, the lens is not included in the kit.
- The IPS lens window is too large and not perfect. It is not recommended to use it together.
- If you experience screen flicker after installing, adjust the screen potentiometer on the back of the console.
- 40 pin motherboards will need the C54 capacitor removed.
- After installation, if it is noted that your touch sensor is overly sensitive or is cycling, please see this article for assistance.
USING THE OSD:
Select/L/R OSD menu:
- Hold Select for 1 second to bring up the OSD menu.
- Use L or R to toggle.
- Press select to navigate the menu.
- Hold select for 1 second to save and exit or allow OSD timeout.
Touch Sensor Functionality:
- Hold sensor 2 seconds to bring up OSD menu
- Tap touch sensor to toggle
- Hold touch sensor 1 second to navigate the menu
- Hold 2 seconds to save and exit or allow OSD timeout.
- Tap touch sensor to increase brightness or hold 1 second to decrease brightness
WARNINGS:
- Test before installation! When you receive a backlight/LCD kit, you should perform a dry run before installing to assure that nothing has been damaged in transit. A dry run or test fit means the kit is not installed in the shell. This includes the use of adhesives, brackets, and any performed soldering. All ribbon cables should have no bends or creases in them. If you are unsure how to perform a dry run, please contact our support team and we will be happy to help. Backlight kits that have been installed are not eligible for replacement or return.
- LCD may break if put under too much pressure or dropped. Please exercise extreme caution when installing.
Why Choose our Store?
Fast Shipping
We know you’re excited to get your gear, so we ship fast—usually within 1-2 business day. With reliable carriers and tracking included, your order arrives quickly and safely, every time.
Great Support
Have questions or need help? Our knowledgeable team is here to assist with fast, friendly support. Whether it’s product advice or order issues, we’ve got your back.
Get in TouchTransparency
What you see is what you get. We provide clear photos, detailed descriptions, and honest specs so you know exactly what you’re buying—no surprises.
Store ReviewsRewards
Get more with every purchase. Join our rewards program to earn points you can redeem for discounts, exclusive offers, and more—just for shopping with us.
Rewards Program


