IPS LCD V2 Kit for Game Boy Advance (Touch Sensor Version) - HISPEEDIDO Shenzhen Speed Sources Technology Co., Ltd.

Game Boy Advance V2 IPS LCD Backlight Kit (Touch Sensor Version) - Hispeedido

Sale price$58.99 USD
125 reviews
125 reviews
SKU: GBA4102

HISPEEDIDO

Quantity:
Pickup available at 519 Davisville Rd. Usually ready in 2-4 days

Game Boy Advance V2 IPS LCD Backlight Kit (Touch Sensor Version) - Hispeedido

519 Davisville Rd.

Pickup available, usually ready in 2-4 days

519 Davisville Road
Willow Grove PA 19090
United States

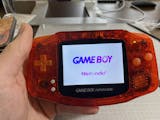
Add this IPS LCD to your Game Boy Advance to make your play more enjoyable with a modern display, featuring enhanced brightness, color and clarity! Features two touch sensors to adjust brightness/color modes without any soldering.

FEATURES:

  • 8 touch color filters to choose from - No soldering required.
  • 9 touch brightness levels - No soldering required.
  • Brightness and color touch adjustment through pre-soldered sensors.
  • Customize with your choice of a GBA Screen lens - Not included.
  • Compatible with both 40 and 32 pin models.
  • Generic version can save brightness settings after powering off.

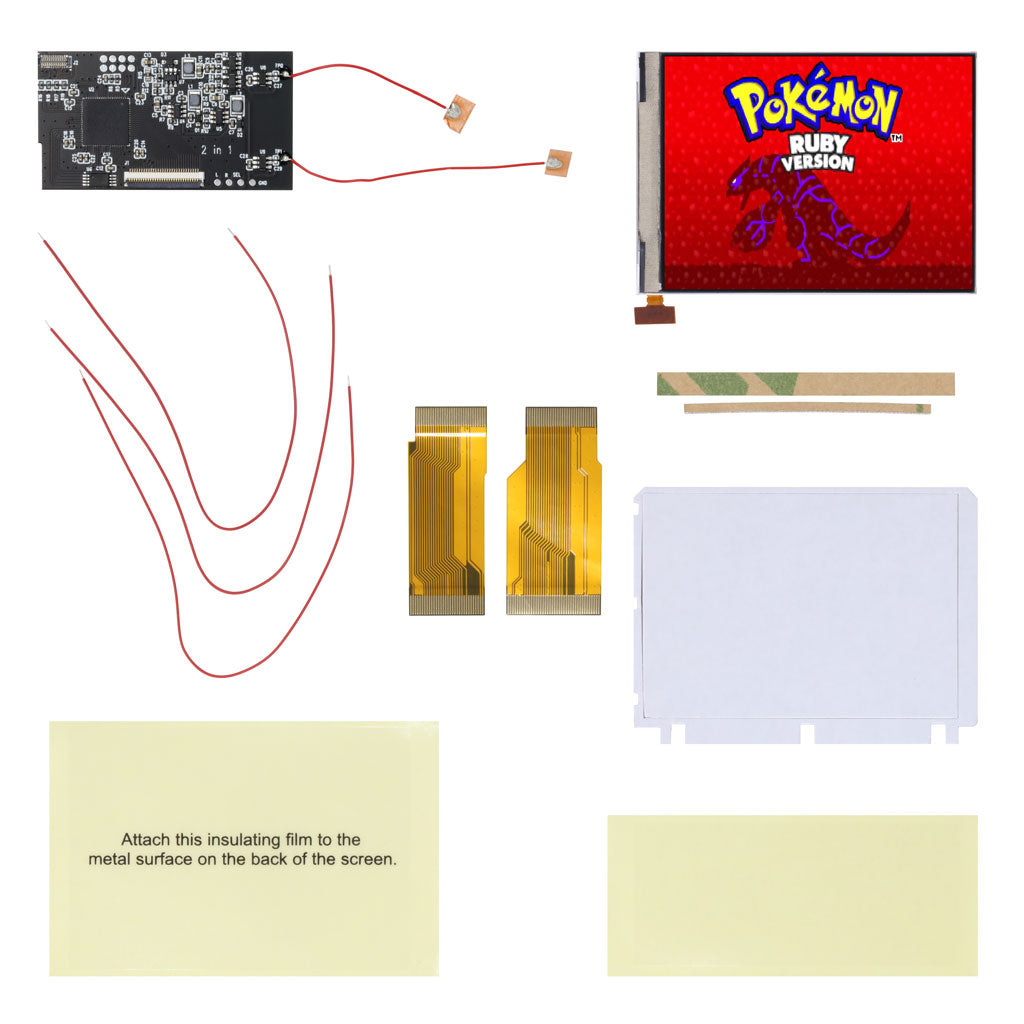
INCLUDED:

  • 1x IPS LCD
  • 1x PCB with two pre-soldered touch sensor wires
  • 1x Adhesive (Not needed if using custom bracket and dust guard)
  • 1x 40 pin ribbon
  • 1x 32 pin ribbon
  • 1x Set acrylic spacers (Not needed if using custom bracket)
  • 3x Wires
  • 2x Insulation films

    DOCUMENTATION:

    NOTES:

    • The IPS panel's viewing area is slight larger than that of the AGS-101. In order to make the entire display visible, the LCD requires a lens with a slightly larger viewing area (~1 mm on each side).
    • Optional: Button control brightness adjustment includes wires that will need to be soldered.
    • Purchase a glass screen or upgrade to a tempered glass screen separately. A screen is NOT included in this kit.
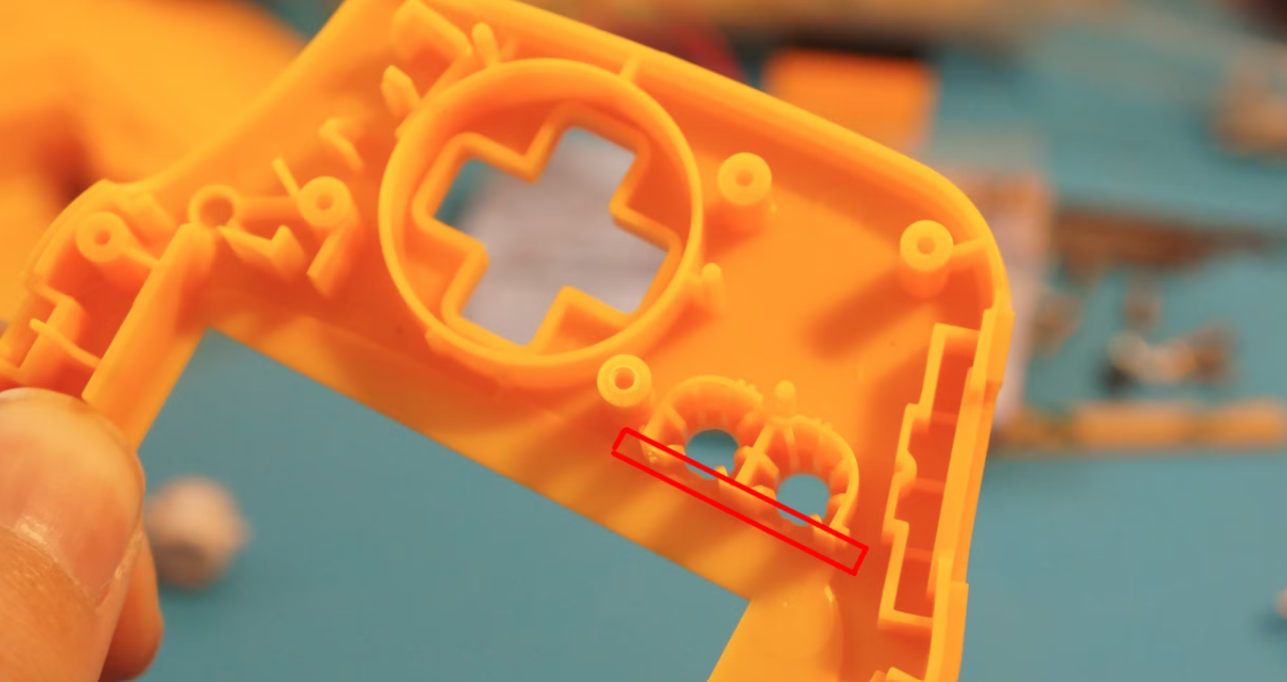
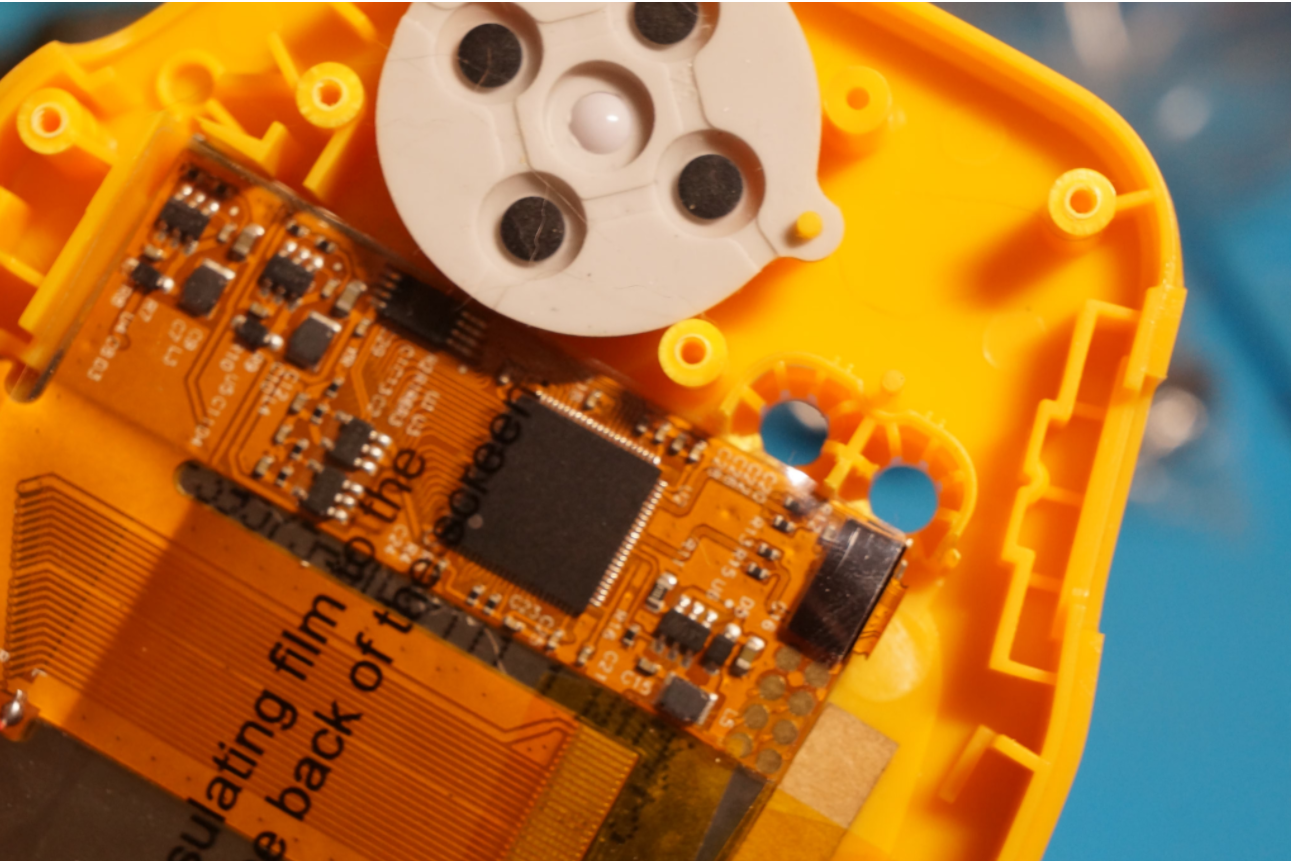
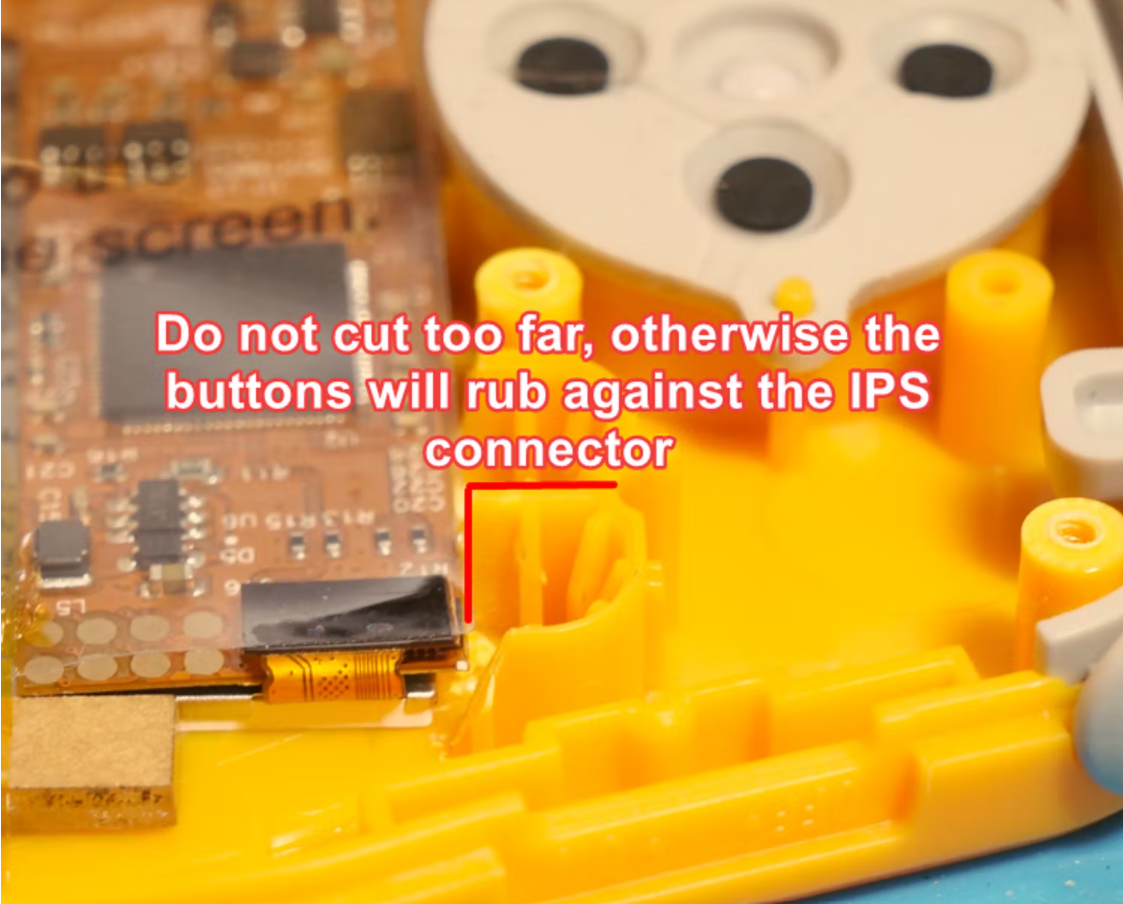
    • If using our pre-cut IPS shells, some trimming near start/select may be needed (Please see Media section for examples)
    • Bracket sold separately. Pair with a dust guard for easier install.
    • After installation, if it is noted that your touch sensor is overly sensitive or is cycling, please see this article for assistance.

    WARNINGS:

    • Test before installation! When you receive a backlight/LCD kit, you should perform a dry run before installing to assure that nothing has been damaged in transit. A dry run or test fit means the kit is not installed in the shell. This includes the use of adhesives, brackets, and any performed soldering. All ribbon cables should have no bends or creases in them. If you are unsure how to perform a dry run, please contact our support team and we will be happy to help. Backlight kits that have been installed are not eligible for replacement or return.
    • LCD may break if put under too much pressure or dropped. Please exercise extreme caution when installing.

    Customer Reviews

    Based on 125 reviews
    74%
    (92)
    8%
    (10)
    9%
    (11)
    2%
    (3)
    7%
    (9)
    M
    Mark H.
    The screen freezes up while the game continues to run

    Installed the screen and it works fine for a while, but the screen randomly freezes, while the game stays responsive (you can hear music playing and buttons stay responsive).

    I tried to get support from seller, but so far received none.

    J
    Josh J.
    Took a chance on a great display!

    (Note: I have very little electronics background, and this is my first ever console mod. When I say left and right, I am referring to the left and right side of the shell when it is opened, and face down in front of you, as if being worked on.)
    I admittedly took a chance ordering this display, as the instructions and general product info here are greatly lacking. As are my skills... but I received and installed this today and it looks great!

    Parts used:
    GBA Prestige Shell - IPS Modified
    GBA IPS V2 Screen Lens - Tempered Glass
    I did NOT use the IPS V2 LCD Bracket.

    The screen looks and performs great and is leaps and bounds better than an AGS-101 or DS Lite screen. (Unfortunately, I do not have any other IPS screens to directly compare this to at the moment.) There are 8 color options and 9 brightness options. The color and brightness touch controls work perfectly and are quite sensitive. Even resting the bottom of the GBA against clothed skin causes the sensor to trigger. This is something I'll get used to over time and learn to avoid. You also have the option to set up the usual button-based controls, though you will lose the color pallet adjustment. (The wires for this are included, but do require soldering.)

    As I used an IPS-modified shell and no bracket, I started by applying the adhesive to the inside of the shell. I applied it using the top-left lip on the inside of the shell as a guide. Aligning the adhesive to the top-right is not correct and will result in the adhesive being visible. Just be sure to test the placement before removing the backing, as it only fits perfectly one way. (The included adhesive was not 3M-branded, but still appears to be of good quality.) Make sure to apply the clear insulating film to the back of the display.

    The display itself, when dropped in, needs to be aligned with the top-right of the interior lip. I did not use a bracket or the provided "big stick" for alignment. Just make sure that the screen is firmly aligned with the top-right corner. (Remember, adhesive goes top-left, the display goes top-right.)

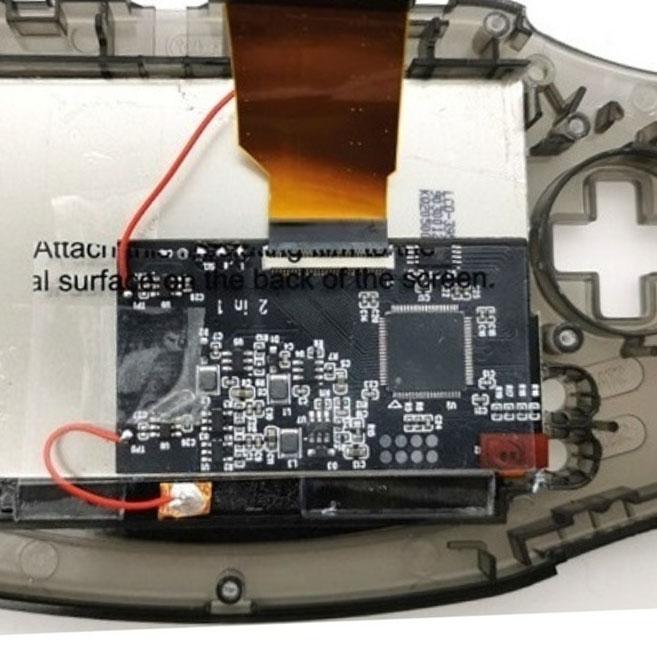
    Connecting the display itself to the control board was a bit tricky and did require small tweezers, patience, and very steady hands. The control board is also about ~0.5-1mm too wide, but I was still able to connect the cable. (Trimming the shell slightly would fix this, but I do not believe that is necessary. Everything still fits just fine.) The board is not 100% squared up with the bottom corner of the display, as the length of the board and position of the connecting cable do not allow this. (Only off by a couple of degrees.) I used Kapton tape to secure the control board to the back of the display. I do wish that the wires for the touch-based adjustments were just a few millimeters longer, as they only barely reach their recommended spots within the shell. I was afraid that these wires might break at the soldering point on the board as I applied them. I also secured the wires and touch sensors with Kapton tape, as the adhesive on the back of the sensors isn't great.

    All and all, a very easy install that I'm very happy with! I'm a total newbie to modding and still managed to figure it out, even with the poor installation instructions provided here.

    i
    ice9
    Looks great, some minor issues

    Straightforward installation, nothing too difficult. Soldering experience, and patience, recommended. V3 KITS ARE NOT DROP-IN FOR "IPS READY" SHELLS, they will require minor trimming.

    Touch sensors are finicky, I decided to remove them both. Screen color palette changes automatically for some reason, at random. Not sure if this is a faulty kit or an insulating issue, but without the touch sensor it really shouldn't be changing color palettes. Makes games unplayable at the moment.

    Aside from these two issues, this would be a 5 star for sure.

    N
    N.S.
    Third time is the charm, I guess.

    I broke two screens trying to get the IPS V3 kit installed, so maybe you can learn from my mistakes. My first recommendation, even with beginning soldering skills, would be to purchase the Unbranded IPS V2 kit. I installed it in my first GBA without issue nearly a year ago, and it is still working great. Even with my amateur soldering skills and a cheap soldering iron, I have the brightness controls working well.

    I was lured into buying the V3 kit by the promise of an easier install, better display, touch controls, and the ability to change the color of classic Gameboy games.

    Let’s start with the easier install, which turned out to be a nightmare, but on the third try I found a process. I tested the first display before installation, and everything appeared to be working well. I installed the screen by itself into the shell, put on the insulating film, and tried to attach the ribbon cable to the PCB. Attaching the ribbon cable was difficult because the PCB has a section sticking out into the plastic surrounding the start and select buttons. With much maneuvering I finally got the ribbon cable attached. I then connected the PCB to the main GBA board, turned it on, and the screen briefly showed a light and went black. After an hour of trying to reseat everything multiple times, I decided I must have broken something. I ordered a new LG display from HHL. When I tested it the first time, it worked, but then I decided to test it one more time and found it was only showing a light around the edges. Later I noticed the ribbon cable on the display had torn. This is when I realized the PCB for the V3 kit, while lightweight, is much heavier than the main ribbon cable of the V2 kit. While testing the second screen I had lifted the screen and the weight of the PCB likely tore the ribbon cable on the screen. Although the first display’s ribbon cable did not appear to be torn, it is likely something similar happened during testing or when I was trying to get the ribbon cable attached with the display in the shell.

    For the third and final LG display, I decided to try something new to prevent the PCB from tearing the display’s ribbon cable. After attaching the display to the PCB, I taped the PCB down to the insulating film on the back of the display prior to performing the first test of the display. Then I cut part of the shell around the start and select button to keep them from pushing against the PCB. Both modifications can be seen in the picture. These added steps made the install go well, and after spending $32 extra for two additional displays I have a working V3 IPS GBA.

    As for the better display, I can’t speak to the display that came in the IPS V3 Kit due to it being broken, but I will say the LG display with the V3 Kit looks about the same as my Unbranded IPS V2 Kit.

    The touch controls are nice but cycling through brightness to go down one or two notches gets tedious. I prefer the ability to go up or down in brightness the way IPS V2 Kit does, and it is nice the V3 Kit provides this option. However, I have not tested the V3 button brightness control, because I’m afraid to touch it now that it is working.

    The color filters are an interesting feature for playing Super Mario Land in black and white, blue, or another color. More of a novelty than being useful.

    Overall, I am happy with the result, but extremely disappointed in the installation process.

    J
    John B.
    I broke it.

    You can tell this is a new, unfamiliar product. When I initially plugged it all in, the screen did work. The solder-less brightness controls were cool, but I never figured out how they would get used while installed inside the shell. The instructions were very hard to follow (as a first-time modder, mind you).

    The store page suggests that you can buy the plastic bracket meant for the IPS v2 kit, and use that to mount the screen, albeit with some cutting. Sure enough, I bought the bracket (since it's cheap) and while it fit the screen perfectly, the circuit board did not fit at all. Also, even without the bracket, the board pushes up against the edge of the Start/Select button enclosure (on a custom "Prestige" shell I bought from this site) and doesn't fit quite perfectly. Not sure what's up with that.

    Anyway, I eventually broke this screen while trying to carefully peel it off of the adhesive (bad idea, I know) to get out a stray hair that got caught inside. Next time, I am trying a v2 kit in the hopes that I can install that adhesive-free with the bracket.

    M
    Mark S.
    Great Display, easy to install.

    I was worried that I might mess it up, s as this was the first time I’ve ever done a mod like this. It was really easy, I got the buttons soldered so the brightness controls work with the buttons. It turned out better than I could have imagined.

    Why Choose our Store?

    Fast Shipping

    We know you’re excited to get your gear, so we ship fast—usually within 1-2 business day. With reliable carriers and tracking included, your order arrives quickly and safely, every time.

    Great Support

    Have questions or need help? Our knowledgeable team is here to assist with fast, friendly support. Whether it’s product advice or order issues, we’ve got your back.

    Get in Touch

    Transparency

    What you see is what you get. We provide clear photos, detailed descriptions, and honest specs so you know exactly what you’re buying—no surprises.

    Store Reviews

    Rewards

    Get more with every purchase. Join our rewards program to earn points you can redeem for discounts, exclusive offers, and more—just for shopping with us.

    Rewards Program